The vast and mysterious world of Dwarf Fortress stretches out before you like an endless abyss. With countless bewildering buttons and unexplored systems yet to uncover, the adventure promises to be a thrilling one. But fear not, my friend, for I am here to offer some sage advice. First and foremost, be patient with yourself. Don’t be too hard on yourself, and certainly don’t blame your dwarves if a marauding band of goblins or a ferocious dragon throws a wrench into your plans for a new fortress. These things happen, and they are all part of the fun.
Now, let’s talk strategy. One of the most critical things you need to do is dig deeper. Your core base should be built in the first few layers of pure stone you come across. This may seem like gibberish if you’re in a biome where everything is made of rocks, but trust me on this one.
The simulation in Dwarf Fortress is synchronized to your computer’s frames-per-second, or FPS. This means that things can move incredibly quickly, especially in the early game. If you find yourself struggling to keep up, simply limit the run speed to 60 or lower in the settings. It’s a small tweak, but it can make all the difference. So take a deep breath, my friend, and let the adventure begin!
The Art of Digging Deep: Unraveling the Intricacies of Dwarf Fortress Tiles
To truly master Dwarf Fortress, you must first grasp the intricacies of each tile. These seemingly simple squares are actually composed of two parts: the block and the floor. When you mine a tile, you remove the block, leaving only the floor. But if you choose to channel a tile, you’ll remove both the block and the floor, leaving behind a ramp on the floor below.
It can be a bit confusing to visualize how this all plays out over multiple levels, but fear not! With time and practice, you’ll soon become a master of the mines. So take a deep breath, grab your pickaxe, and let’s delve into the depths of Dwarf Fortress!
The Importance of Tile Movement and Staircases in Dwarf Fortress Design
Before we dive too deep into the complexities of Dwarf Fortress, let’s establish some basics. Units, whether dwarves or other creatures, move from one tile to another at varying speeds based on their species and other factors. They can even move diagonally and squeeze between the corners of two filled tiles. However, the only way to truly prevent something from moving out of a tile is to surround it with a perfect box of either natural or constructed walls. Trolls and other larger monsters may smash open locked doors.
For a Dwarf on the move, one tile is one tile. Whether they’re walking on flat ground, stairs, or a ramp, the distance remains the same. Various animals and dwarfs can obstruct their path, thus slowing them down. That is why big corridors should be 2-3 tiles wide and significant stairs should be built in 2×2 blocks. In fact, some players even base their entire fortress around a central 3×3 spine staircase. It’s a solid strategy for budding fortress architects.
RELATED: The Legends of Dwarf Fortress: A Game for Eternity
I’m emphasizing the importance of tile movement and staircases because a key aspect of designing your Dwarf Fortress is making it at least somewhat vertical. Two rooms or hallways connected by a staircase effectively have no tiles between them. So, consider placing a stockpile of metal beneath your blacksmiths instead of beside them. Dwarves are completely pleased with living and dining quarters that are directly above or below their working areas. So, take advantage of this fact and design your fortress with verticality in mind.
From Booze to Farms: Navigating Dwarven Survival in Dwarf Fortress
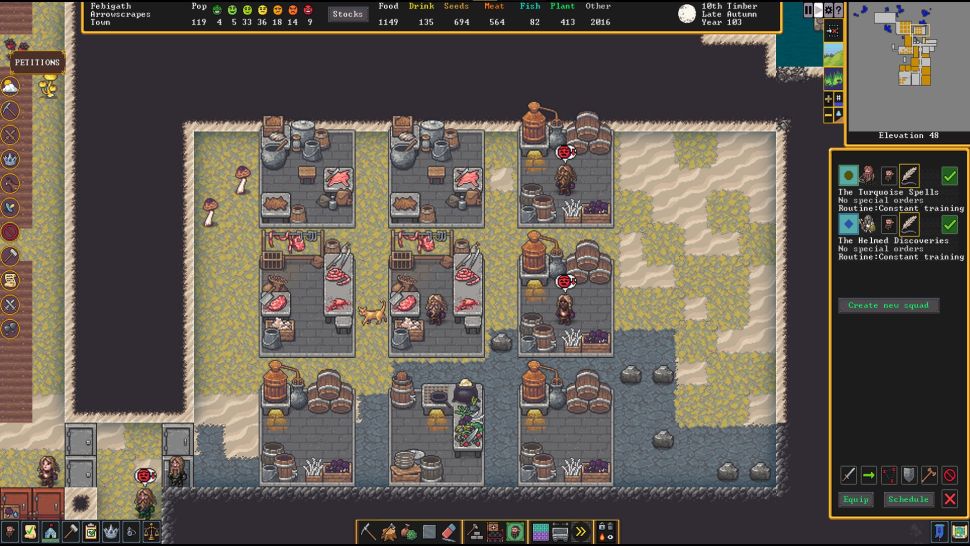
In the beginning, your tiny dwarven community can survive harmoniously by relying on their primal instincts of fishing, hunting, and foraging. In any environment, they are capable of gathering wild fruits and turning them into a much-needed elixir with the help of the Still that you constructed during the tutorial. Booze is not just a luxury, it’s a vital component of their sustenance. Drinking water is an option, but it is known to drive them to a murderous rage in no time.
Once you’ve overcome a few initial challenges, farming is a breeze. All you need to do is select a suitable patch of land, and under Build-Workshops-Farming-Farm Plot, you can establish your farming operations. There’s no need for grandiose farm plots, a 2×2 or 4×4 field will suffice. Surprisingly, the yield of the Dwarven farms is astronomical, and even a small, unfertilized plot growing Plump Helmets can provide sustenance for a multitude of dwarves.
To cultivate authentic dwarven crops underground, you’ll require an underground space with a soil floor. This could be anything from silt, sand, loam, clay, to mud. Fortunately, this is readily available in some biomes within the first few z-levels beneath the earth. However, in other areas, obtaining this resource can be quite challenging. In such cases, you’ll have to resort to dwarven irrigation. Making wooden buckets at the carpenter shop, digging a hole using Channel, and naming that location as a Pond in the zones menu are all required steps. Ensure that the hole doesn’t get filled beyond 2/7 with water for a generous coating of fertile mud.
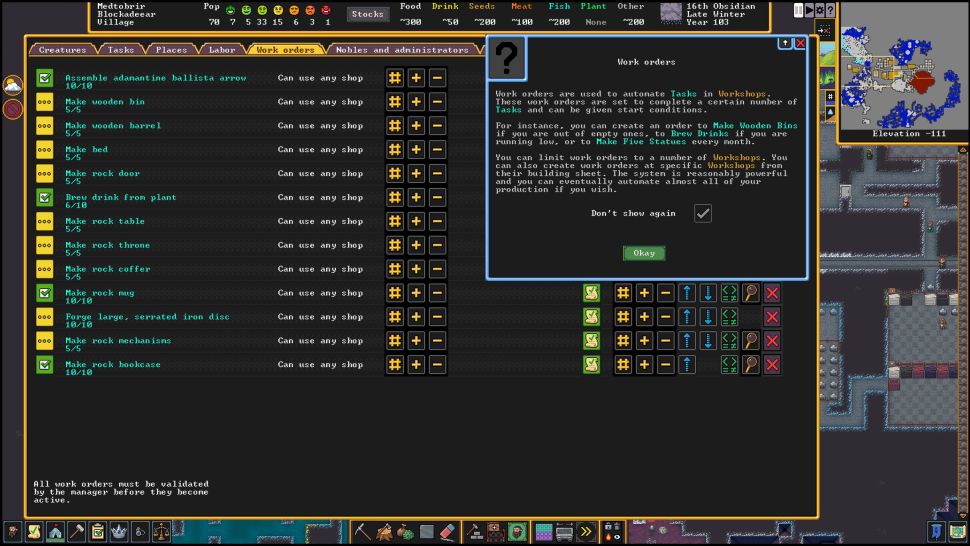
In addition to the farm, you’ll also need to construct a kitchen. Because dwarves only eat a few meals every season, utilize the Work Orders option to set up a regular order of Fine Meals for five or six dwarfs. This will utilize three units of food and provide a reasonable variety to your dwarves. Don’t fret about anything more intricate for the time being.
In case your stock of booze starts dwindling, don’t let panic set in. Instead, channel your inner dwarven ingenuity and head over to the Labor menu. Once there, navigate to the Kitchen tab, and with the deftness of a true master craftsman, disable the option that allows your dwarves to use booze for cooking. As you’re at it, you may also want to consider disabling the option of using seeds for cooking, except for those precious nuts like almonds or walnuts.
By taking these measures, you can preserve your precious stock of booze and guarantee that your dwarves have enough to quench their thirst. Remember, dwarves are a resilient bunch, and they’ll do whatever it takes to survive and thrive, even if it means giving up their booze for a little while.
Creating the Ultimate Dwarf Fortress: Building the Perfect Dining Hall and Meeting Area
Indulging in food and drink is one of the most beloved pastimes of dwarves, and providing them with a cozy dining space should be on the top of your priority list. A well-crafted dining hall with smoothed stone walls, a few tables, and some comfy chairs will quickly become the heart of your fortress. To take things up a notch, designate it as a Dining Hall using the zones menu and watch your dwarves flock to it in no time. By adding some tasteful decorations, engravings, and storage nearby that accepts only Prepared Meals and Drinks, you can easily boost the morale of your hungry little buddies.
ALSO READ: High on Life Review – The Most Hilarious Shooting Game You’ll Ever Play
In Dwarf Fortress, you can achieve some of the most crucial feats by setting up a Meeting Area. This deceptively simple feature can be transformed into a meeting hall, statuary garden, zoo, museum, or a memorial to the fallen, depending on what you fill it with. It serves as a congregating spot for idle dwarves and wandering pets, making it a great way to bring them out of the wild and into the safety of your fortress.
As your stronghold expands, you’ll need to build necessary facilities such as hospitals, temples, guildhalls, and bars. The beauty of these constructions is that they can be created simply by selecting a Meeting Hall and clicking the Shield-Shaped button to add it to another. Each one of these buildings has its unique requirements, but they work together as a cohesive whole. For example, taverns need extra rooms for visitors and long-term residents to sleep in, while a hospital can suffice as a big room with beds and chests, as long as it has access to fresh water. And, don’t forget to leave some space of at least 5×5 open in any tavern or temple so that your dwarves can shake a leg and let loose their inner party animals.
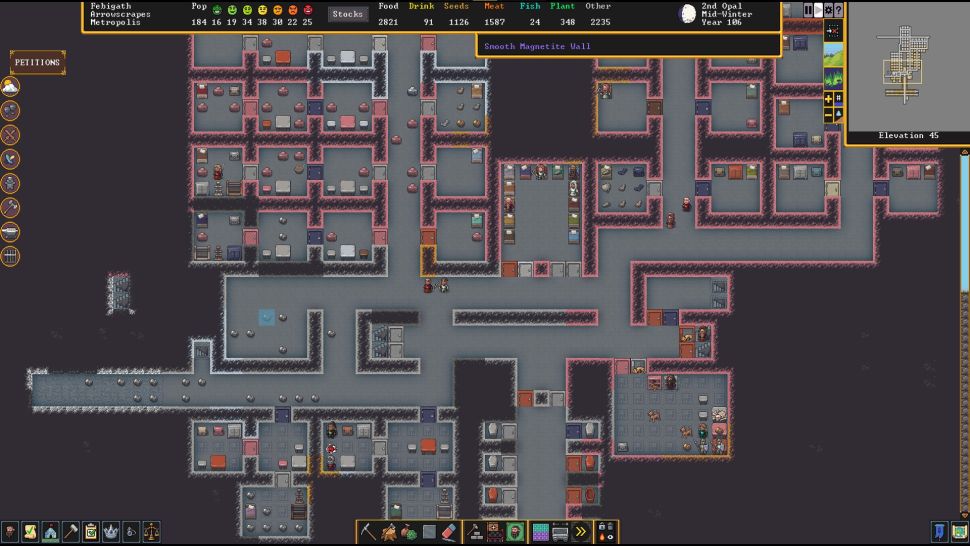
Sleep Tight, Little Dwarves: The Art of Bedroom Optimization in Dwarf Fortress
Ah, the humble bedroom. It may seem like a simple affair, but it’s one of the most crucial parts of any self-respecting Dwarf Fortress. However, it’s easy to get carried away and create sprawling, luxurious accommodations for your hardworking dwarves. But let me tell you a little secret: they don’t need it.
In fact, a one-tile chamber with just a bed and a door is all a dwarf really needs to get some quality shut-eye. Of course, if you’re feeling generous, you can go up to a 2×2 size and throw in a cabinet or some statuary for a touch of personalization. But don’t go overboard – those larger bedrooms should be reserved for the elite and noble members of your fortress.
If you’re really pressed for space, a dormitory with nothing but beds will do in a pinch. Just make sure to give it doors – dwarves may be sound sleepers, but they still appreciate a bit of privacy. And when it comes to layout, don’t be afraid to think vertically. Stacking bedrooms around a central staircase can make them much more convenient and accessible, rather than forcing your dwarves to navigate long, winding corridors.
Of course, some players take bedroom optimization to a whole new level, constructing elaborate fractal hives or intricate windmill patterns. But hey, that’s up to you – just remember that a happy dwarf is a productive dwarf, and a good night’s sleep is key to keeping them happy.
Maximizing Efficiency: Mastering the Labor Menu in Dwarf Fortress
As your dwarven workforce expands, it’s important to ensure that each dwarf is putting their skills to use in the most efficient way possible. And that’s where the Labor menu comes in. It’s the hammer-shaped button in the bottom left corner of your screen, and it’s where you can fine-tune your dwarves’ job assignments.
Each dwarf has a unique set of skills, and as they gain experience in those skills, their proficiency grows. This means that a Legendary Weapon smith can create weapons of far greater quality than a novice. By creating custom work details, you can assign dwarves to specific jobs based on their skill level, ensuring that each task is handled by the most capable hands. So go ahead and create work groups like Carpenter, Blacksmith, Mason, Chef, and Brewer to make sure that your fortress has the basic necessities covered by specialists. And who knows, maybe someday you’ll have a team of Legendary Crafts dwarves creating masterpieces that will be the envy of all other dwarves!
Unlocking the Secrets of Item Quality: Understanding the Symbols in Dwarf Fortress
Have you ever noticed the symbols surrounding the names of items in Dwarf Fortress? They hold the key to the quality of an item and its impact on the game. The plus signs indicate quality, with the basic items having no symbol, and the quality improving in order from well-crafted to finely-crafted, superior quality, exceptional, and masterful. These symbols determine the value of the item and how much happiness it brings to your dwarves.
If you see little suns or asterisks around an item’s name, it means the item has been decorated with gems, shells, or other materials. The symbols outside of the angle brackets indicate the quality of the decorations themselves.
The highest level of quality, an artifact, is a special item that is only created through strange moods. When a dwarf experiences a strange mood, they will claim a workshop and begin crafting a unique item based on their vision. To ensure their success, provide them with the materials and workshop they need as quickly as possible, as a failed strange mood can lead to violent behavior.
To get a better understanding of an item’s quality, use the spyglass tool to view its physical description and related information. With this knowledge, you can create the highest-quality items and keep your dwarves happy and prosperous.
Building a Stone Trade Depot: A Magnificent Centerpiece for Your Fortress’s Trade Network
Create a magnificent stone trade depot that beckons to merchants from far and wide! Whether it’s perched outside, nestled in a cozy cliffside cave, or ensconced in an underground lair with a fancy ramp, make sure it’s big enough to accommodate a 3×3 wagon with ease. But don’t stop at size alone – the depot’s primary ingredient must be stone, as it’s an excellent choice for maximizing your enjoyment in the event of a catastrophic fire. After all, as the folks at Dwarf Fortress say, “Losing is fun!”
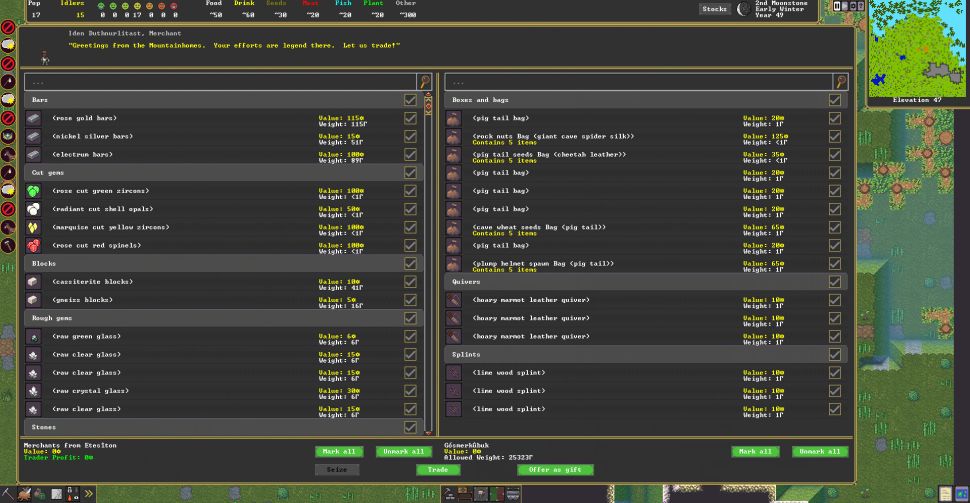
In the world of trade, merchants are the lifeblood of any thriving outpost. Even if you’re churning out subpar bone crafts, it’s critical to attract traders in order to secure the essential goods and beverages that keep your dwarves going. While dwarven caravans from the mountain homes are a fall staple, don’t overlook the potential of elf and human visitors during the spring and summer. Be warned, though: when dealing with humans, keep in mind that their wares tend to be oversized for your diminutive dwarves. And when it comes to the delicate sensibilities of the elves, avoid offering them anything derived from plants or animals – including ash-based soap or glass – unless you want to risk a potentially disastrous encounter.
Of all the caravans that visit, the dwarven caravan is the most significant. The liaison from the Mountain homes will take note of your outpost’s progress and report back to their superiors each time they visit. As your outpost’s wealth grows, more and more migrants will arrive in waves, bringing with them new titles of nobility that will elevate your fort’s standing in the community. So don’t skimp on creating a first-class trade depot – it could be the key to your outpost’s future success!
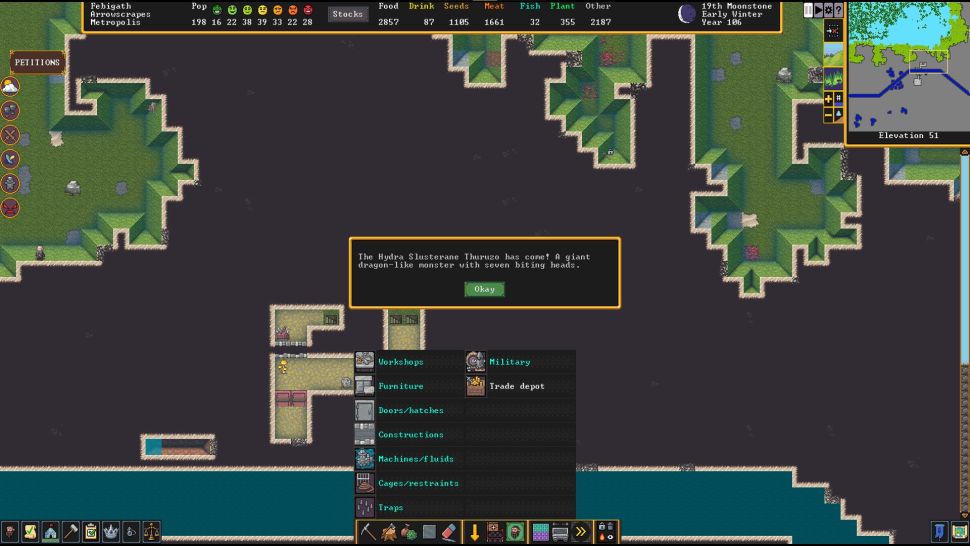
Fortress Visitors: How to Attract the Best Monster Hunters and Brave Beast Slayers to Your Dwarf Fortress
As you delve deeper into the earth, and your fort grows in size and stature, you’ll begin to attract all sorts of new visitors. The first to arrive will likely be fierce monster hunters and brave beast slayers, drawn to your fort by the legends of your exploits. As you breach the massive caverns deep below the surface, they’ll come knocking at your gates, seeking shelter and refuge from the dangers that lurk in the shadows.
ASLO READ: High on Life – A Guide to Becoming the Most Dreaded Bounty Hunter in the Galaxy
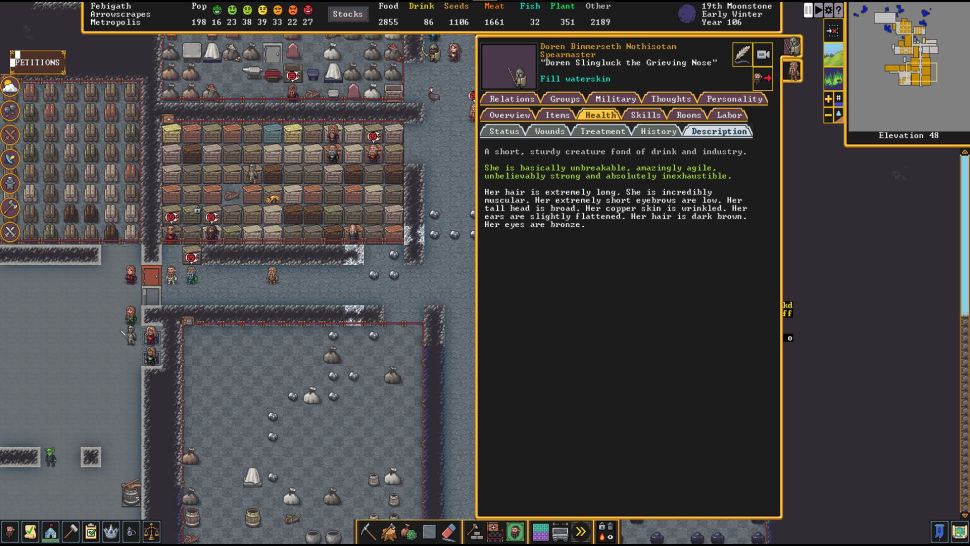
But how do you decide who to let in and who to turn away? Well, it’s simple really. Just take a look at their petition, which will appear in the top left corner of your screen. Check out their name and see if they have a reputation for valor and bravery. Then, if you’re still not sure, open up the creatures menu by clicking on the dwarf head button in the bottom left. There, you can review their past deeds and see if they’re truly worthy of a place in your fort. With a discerning eye and a keen sense of judgment, you’ll be able to build a thriving community of warriors and defenders, ready to take on any foe that dares to threaten your home.
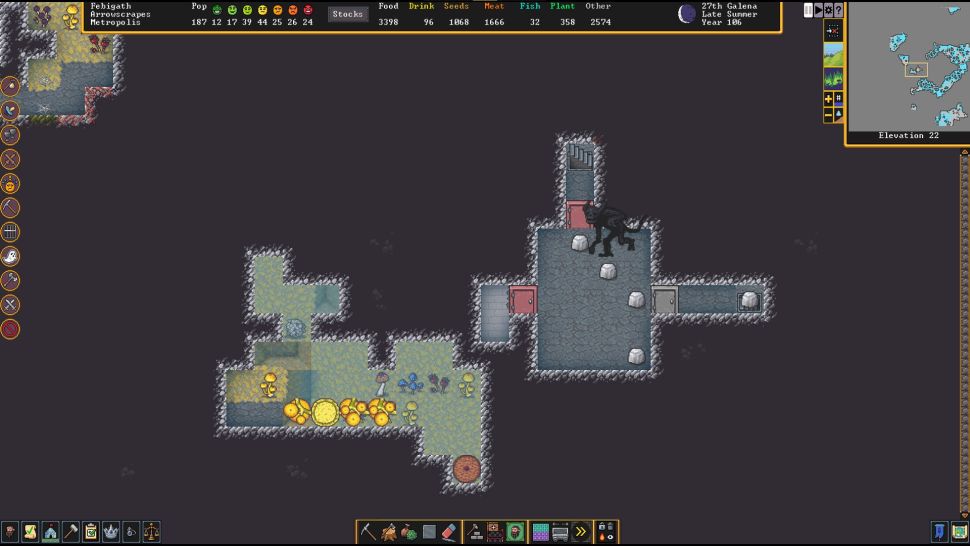
Unleash the Power of Metallurgy: Digging Deep for the Precious Ores of Dwarf Fortress
To craft the finest metal goods in all the land, you’ll need to master the art of metallurgy. And that means gathering the raw materials you need to create your masterpieces. But where do you find these precious ores, you ask? Well, the answer is simple: you mine them from the earth itself.
As you delve deeper into the depths of Dwarf Fortress, you’ll come across layers of sedimentary and igneous rocks like siltstone, dolomite, chert, basalt, and rhyolite. And buried within these rocks, you’ll find veins of precious metals like iron, copper, and gold. It’s up to you to dig them out, haul them back to your fortress, and put them to good use.
But first, you’ll need to process them. That’s where your trusty Wood Kiln, Smelter, and Metalsmith’s Forge come in. Using the Wood Kiln, you can turn the trees you’ve chopped down into charcoal, which will be used as fuel for the Smelter. Then, at the Smelter, you can either turn your ore into bars or smelt specific ores by name. Finally, at the Metalsmith’s Forge, you can choose what you want to make and specify what metal to use by selecting the spyglass symbol next to the order.
And don’t forget, Dwarf Fortress is more than just a game – it’s an educational experience. As you explore the depths of the earth and learn about real-world mineralogy, you’ll gain a new appreciation for the wonders of the natural world. So get digging, and let the riches of the earth be your guide!
Cleanliness is Key: How to Make Soap and Keep Your Dwarves Healthy in Dwarf Fortress
Listen up, fellow fortress-builder! If you want your dwarves to stop being filthy and disgusting, it’s time to take matters into your own hands. And by that, we mean finding them a source of fresh water and making some soap.
To make soap, you’ll need to set up a few workshops. First, you’ll need a Wood Furnace to make some ash. Then, you’ll need a Kitchen where you can turn animal fat into tallow. Next up is the Ashery, where you’ll turn that ash into lye. And finally, you’ll need a Soap Maker’s workshop where you can combine the tallow and lye to create your very own bars of soap.
Now, we know this might seem like a lot of work for something as simple as soap, but trust us – it’s worth it. Soap and clean water are essential to keeping your dwarves healthy and happy. And not only that, but soap is also required for doctors to clean wounds. Without it, even the tiniest scratch can become infected and prove deadly within a few seasons. Trust us, losing your best armorer to a stray cat bite is not a fun experience.
So don’t wait – set up those workshops, gather those materials, and get to work! Your dwarves will thank you for it. And who knows, maybe they’ll even start taking pride in their personal hygiene.
From Trash to Treasure: Keeping Your Fortress Clean in Dwarf Fortress
Hey there, listen up! I know I just reminded you to wash your hands, but there’s another thing you need to take care of: The Trash! Don’t let your Dwarf fortress become a dump, designate an outdoor stockpile for refuse and put a Dumping zone over it. In the Labor menu, under the Standing Orders tab, instruct your dwarves to dump all “other” things into that zone. This includes old socks, food scraps, and even teeth knocked out during bar brawls.
Items in stockpiles designated for refuse will deteriorate and rot away faster, especially when exposed to the elements, which is good for the overall health of your fortress. Later on, when you have access to magma, you can create a shaft with a Dump designation over it to toss trash directly into the fiery pits for instant disposal.
But hey, if you’re lucky enough to have embarked on a volcano, then you’ve hit the jackpot! Get started on magma-based disposal right away. No need to worry about the trash piling up when you have a fiery abyss to dispose of it in.
So, take out the trash and keep your fortress clean! Your dwarves will thank you for it, and you’ll be one step closer to creating a thriving and sustainable community.