Unleash the full potential of your demon-slaying hero in Diablo 4 with our comprehensive guide! From mastering the art of transmogrification to refining your gear through enchantments, upgrading healing potions, and ensuring peak performance with gear repair, we’ve got you covered. Join us as we delve into the secrets of customization, power, and style in Sanctuary, and prepare to conquer the forces of darkness while looking absolutely amazing!
Transmog and Unleashing Your Hero’s Style in Diablo 4
Are you ready to slay demons and look fabulous while doing it? In Diablo 4, the transmogrification system allows you to customize the appearance of your gear, ensuring you always step out in style. Say goodbye to mismatched threads and clashing colors in Sanctuary! Let’s dive into how you can unlock transmog and change your character’s appearance, so you can create a hero with a whole vibe of their own.
Unlocking Diablo 4’s Transmog
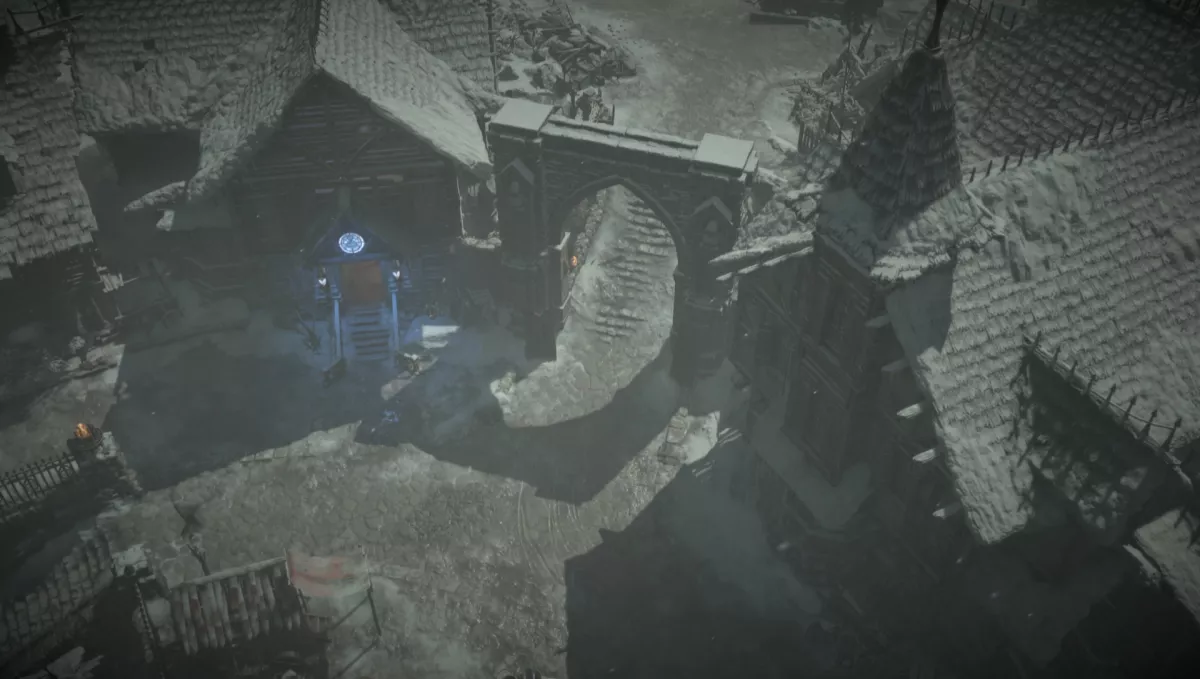
To access the transmogrification feature in Diablo 4, the first step is to complete the Prologue and venture to Kyovashad, the game’s initial hub area. The journey shouldn’t take more than one to two hours. Once there, seek out the Blacksmith, located just outside the weapons and armor shop (you can spot him by looking for the anvil icon on the minimap). He can be found southeast of the Kyovashad fast travel point.
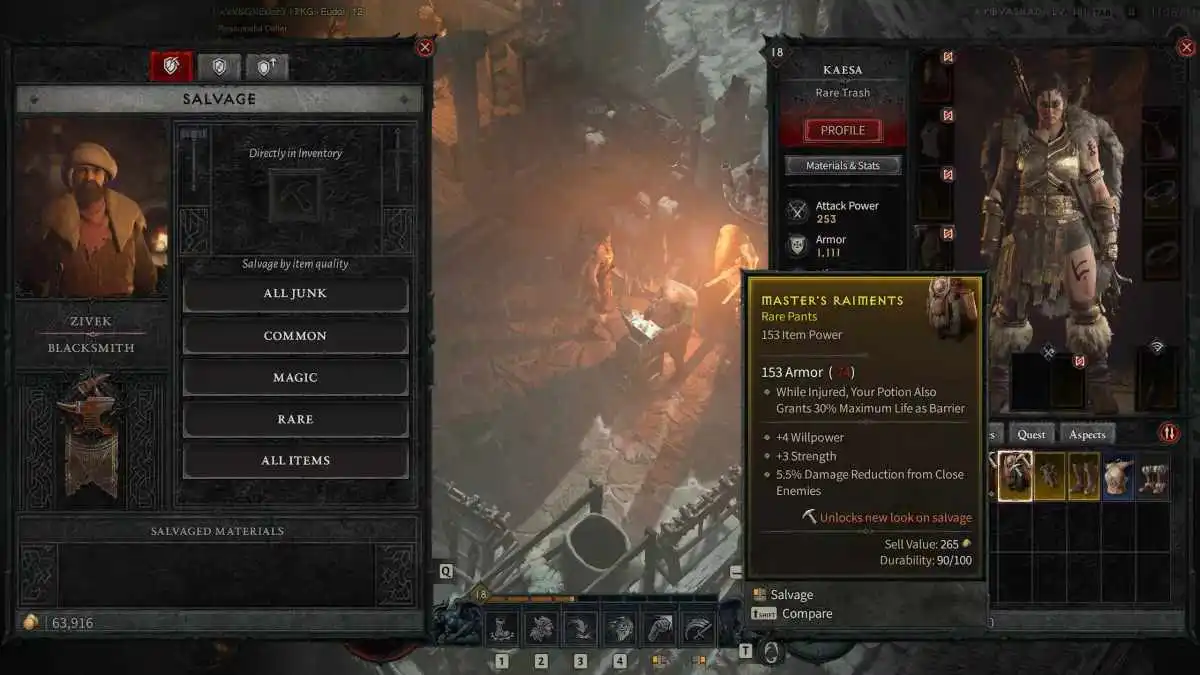
Currently, salvaging gear through the Blacksmith is the sole method of unlocking transmog items in the game. During your time in the Prologue, you likely picked up several armor items that can be salvaged for transmog purposes—except for accessories and certain unique weapons.
RELATED: Diablo 4 – Your Comprehensive Guide to Conquer the Dark World
Changing Your Appearance with Transmog
Now that you’ve salvaged some gear and unlocked its appearance, it’s time to head over to your wardrobe. Look for the wardrobe icon on the map, conveniently located north of the Blacksmith in Kyovashad.
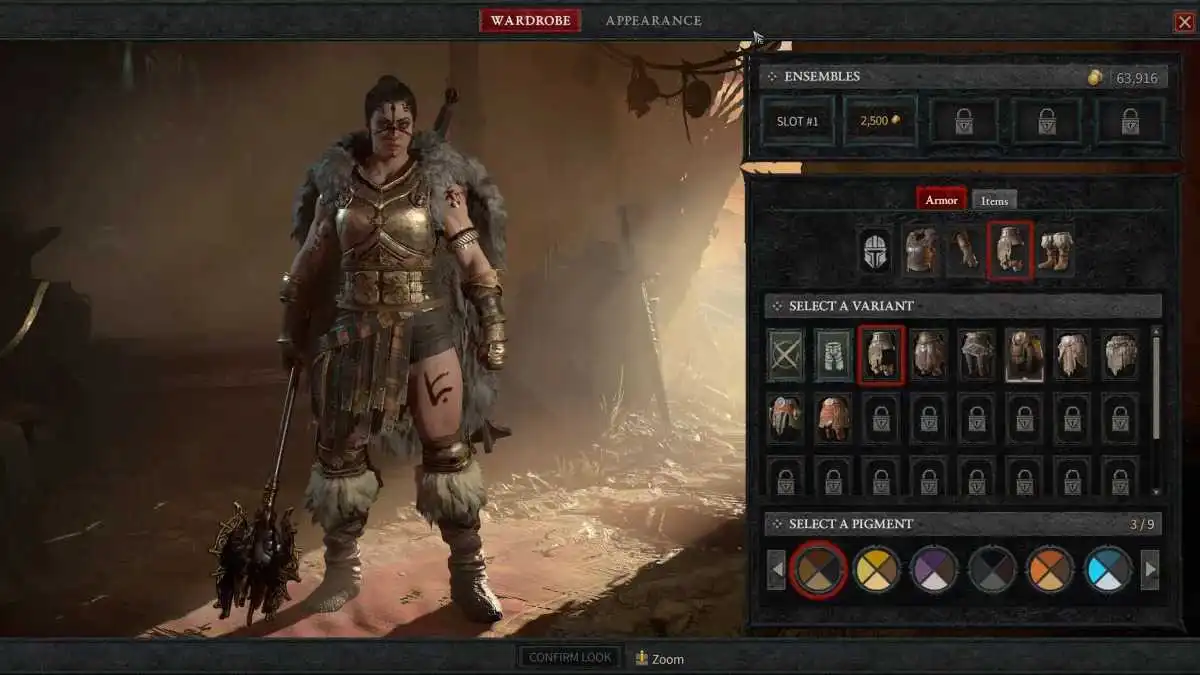
In the wardrobe, you’ll find the gear you’ve salvaged and the option to apply its appearance. Each piece of equipped gear can retain its default look, adopt an unequipped appearance, or showcase the look of any item you’ve presented to the Blacksmith. Additionally, each armor type offers a palette of nine colors, including Green, Yellow, Red, Blue, Purple, Grey, Brown, Orange, or the natural look of the armor. You can save ensembles for quick changes, with the first slot being free and the following four slots costing gold.
While the transmogrification system allows for creative freedom, there are a few limitations. For example, you cannot apply the appearance of different weapon types—so no wielding a staff transmog over a wand or replacing a sword with a mace. Furthermore, changing the color of your armor requires unlocking the transmog for it first; you can’t modify the default look directly.
Moreover, the wardrobe provides opportunities to alter your character’s appearance beyond gear. By heading to the Appearance tab, located at the top of the screen, you can tweak your character’s makeup, jewelry, and markings, as well as the color of the markings. However, hairstyles and hair colors remain fixed and cannot be changed.
With Diablo 4’s transmog system at your fingertips, you can create a demon-slaying hero who is both powerful and stylish. So, get ready to unleash your creativity and conquer the forces of darkness while looking absolutely amazing!
Unleashing Potent Healing in Diablo 4: Upgrade Your Potions!
In the perilous world of Diablo 4, a basic healing potion can only take you so far. To survive the toughest boss battles and grueling dungeons, you’ll need something stronger. Luckily, you can upgrade your healing potions as you progress in the game, ensuring you stay well-equipped for the challenges that lie ahead. Here’s how you can do it!
Leveling Up Your Healing Potions
When you embark on your journey in Diablo 4, you start with four healing potions. While you can find more from chests or defeated foes, upgrading them is a wiser choice. As you gain levels, you’ll require more potent health-restoring elixirs. Don’t forget to repair your gear and uncover waypoints, allowing you to make a swift escape when needed.
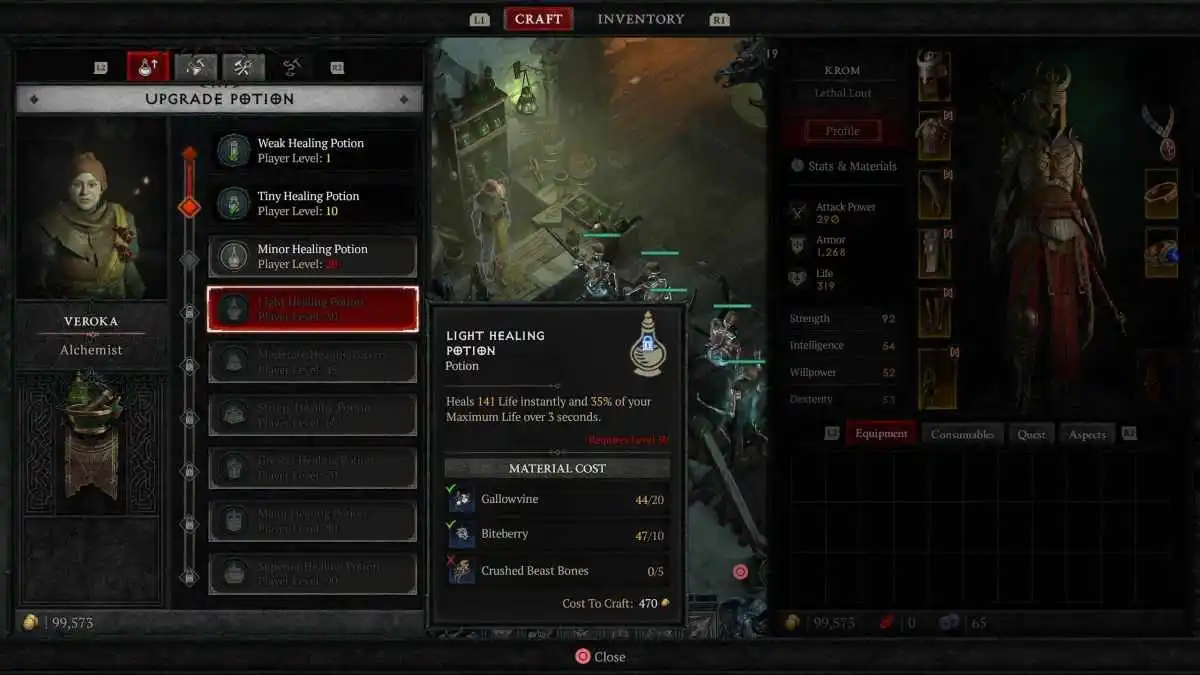
Similar to other gear and items, the quality of potions improves with your character’s level. At the beginning, you’ll wield a Weak healing potion, but as you reach level ten, you unlock the Tiny healing potion. The progression continues every ten levels, granting you access to better and more effective potions. Prepare for a dedicated grind to strengthen your healing capabilities.
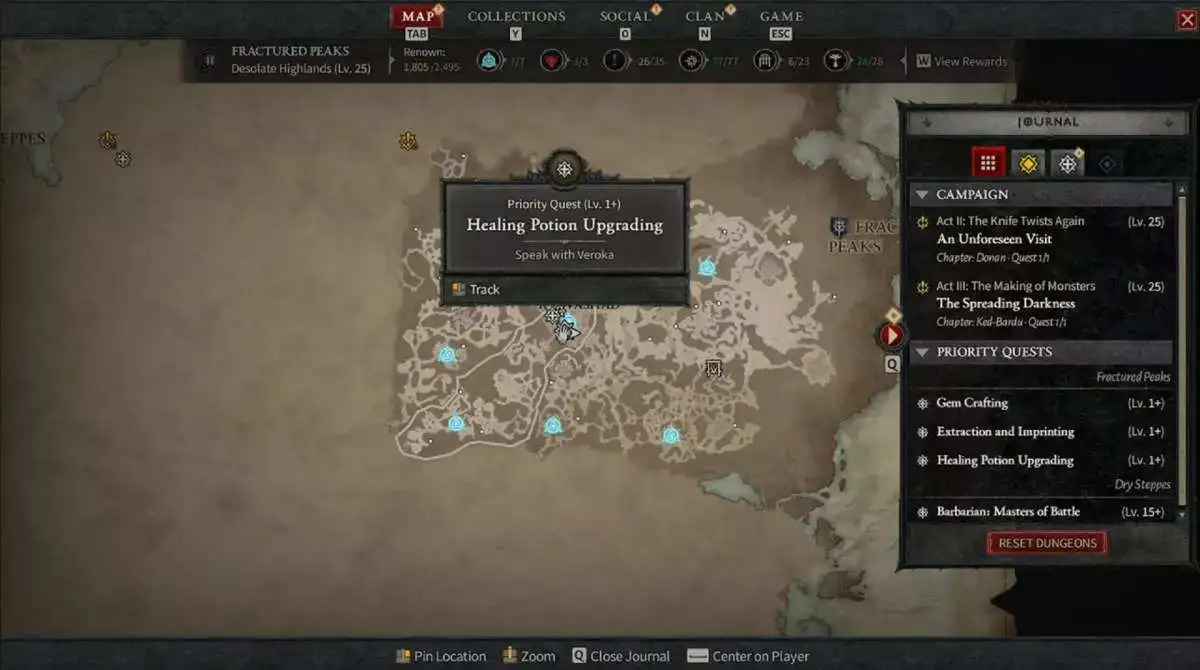
To upgrade your healing potion, seek out the Alchemist, easily recognizable by the mortar and pestle icon on the map. In Kyovashad, you’ll find an Alchemist who can assist you in upgrading your potions. A quest will be available to guide you through the process, starting from level ten.
To enhance your healing potion’s potency, you’ll need two Gallowvine. At level 20, you can further upgrade it to a Minor healing potion by gathering 15 Gallowvine, five Biteberry, and 400 gold. While traversing the path to Kyovashad, keep an eye out for these valuable herbs. You’ll find them scattered around the wilderness in little bushes.
Obtaining Crushed Beast Bones
For those seeking the powerful Light Healing Potion at level 30, acquiring Crushed Beast Bones becomes essential. These bones can be a bit elusive, but they are obtainable by slaying beasts, animals, and werecreatures. To maximize your chances, venture into the wild Scosglen region, located to the north of Fractured Peaks. The easiest route is heading northwest from Menestad, which is itself northwest of Kyovoshad. In this region, an abundance of wild animals and werewolves awaits, providing a prime opportunity to farm up those valuable Crushed Beast Bones quickly.
With upgraded healing potions at your disposal, you’ll be ready to face the darkest evils that threaten Sanctuary. So, go forth, embrace the challenges, and ensure your survival with these potent elixirs!
Item and Gear Enhancement
In the treacherous world of Diablo 4, optimizing your gear is essential for surviving the toughest challenges. To make the most of your equipment, you’ll want to replace useless stats or damage bonuses through the process of item enchantment. Let’s explore how you can improve your gear and fine-tune your build to perfection!
Diablo 4 Item Enchantment: Unleashing the Power
For those familiar with previous Diablo games, item enchanting in Diablo 4 will feel like second nature. Just like before, tinkering with the stats and bonuses on your gear is a pivotal part of achieving your desired build, especially when you reach the maximum level and aim to optimize your character.
However, remember that while gear is essential, you’ll also need to consider the right Aspects and gems to complement your build. Item enchantment is best left for when you’ve reached the maximum level, as you’ll constantly replace gear with better drops. Once you’re prepared to squeeze every ounce of potential from your build, it’s time to delve into the intricacies of Diablo 4 item enchantment.
How Diablo 4 Item Enchantment Works
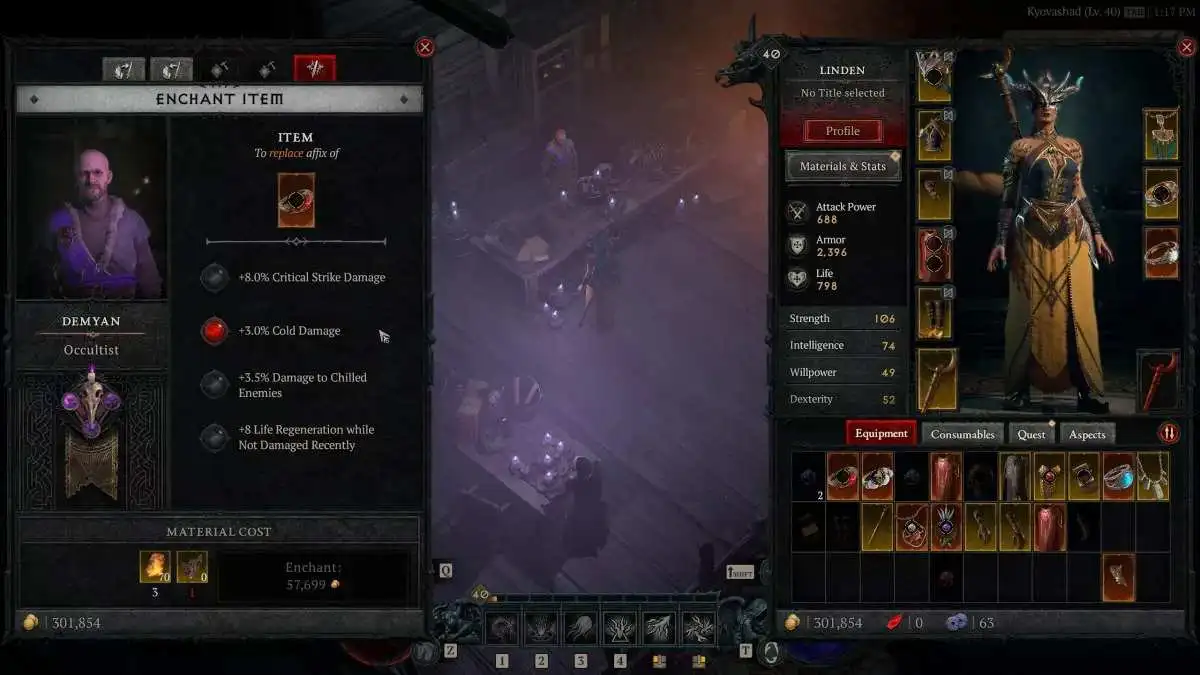
You can enchant items with the help of an Occultist once you reach level 25 or have added at least one Aspect to your Codex of Power. These mystical NPCs can be found in most towns, and they’re the same individuals who extract Aspects from legendary gear. If you’ve played Diablo 3, the process will be familiar, involving the transformation of an undesirable bonus into something better suited to your class or playstyle.
Each item in Diablo 4 comes with various bonuses related to abilities, stats, or other modifiers. Through enchantment, you can change one of these bonuses to another, but be mindful that only one bonus on an item can be altered at a time. Thus, choose your modifications wisely. If you’re not satisfied with the change you made, don’t fret— you can reroll the bonus as many times as you like to explore different options.
With each reroll on the same piece of gear, you’ll receive different random choices, but keep in mind that the price for this service will increase. Additionally, the options presented to you will relate to the gear type. For instance, you won’t find a damage bonus on a pair of gloves, but you might have the opportunity to reroll it into a different resistance type or acquire a defensive multiplier.
Costs and Resource Management
Item enchantment requires both gold and materials. The material cost varies depending on the quality of the item you’re enchanting. Legendary gear demands more resources compared to rare items. As a savvy adventurer, consider salvaging unwanted gear at the Blacksmith rather than selling it for gold. This strategic move will ensure you have an abundance of resources when you truly need to change that seemingly useless bonus on an otherwise perfect piece of gear.
With the power of item enchantment at your command, you’ll become a force to be reckoned with in the realm of Diablo 4. Fine-tune your gear, craft the perfect build, and embrace the challenges that await you as you embark on an epic journey of mastery and triumph!
Ensuring Peak Performance: Repairing Your Gear in Diablo 4
In the perilous world of Diablo 4, your gear takes a beating with each battle, especially when faced with the unfortunate outcome of death. To keep your equipment in top-notch condition and maintain your edge in Sanctuary, mastering the art of gear repair is essential. Fear not, for we have the knowledge to guide you through this vital process.
Repairing Your Gear: A Blacksmith’s Expertise
To repair your precious gear in Diablo 4, your first task is to locate a trusty blacksmith. The good news is that you can find one in most towns and villages scattered throughout the land. As gear plays a pivotal role in your survival, ensuring it’s in prime condition before confronting tough bosses or embarking on lengthy dungeons is of utmost importance.
Though the official release of Diablo 4 might be on the horizon, you can get a taste of the action-packed demon-infested world in the upcoming beta. While you await your adventure, why not learn the valuable skill of repairing your gear in preparation for the challenges ahead?
The Art of Gear Repair
In Diablo 4, your gear will gradually lose durability with use, and the impact becomes even more pronounced if you fall in battle. Fortunately, repairing your gear is a simple task that requires a mere click of a button when you’re in the company of a blacksmith.
RELATED: Diablo 4 Review – Forging Your Legend
Neglecting to address this issue can lead to disastrous consequences, as broken weapons or armor will strip you of their benefits, including valuable stats or passive bonuses. To avoid such setbacks, cultivate the habit of repairing your gear each time you return to town.
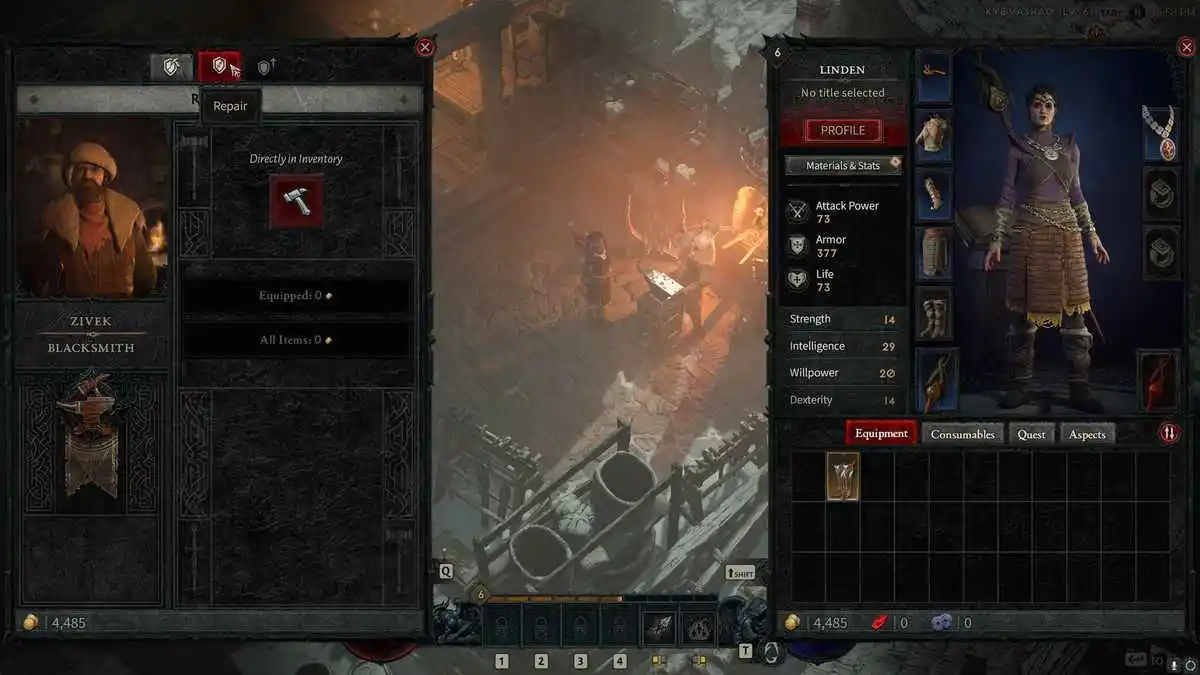
Blacksmiths are conveniently situated in most towns, often found near the waypoints for fast travel. To locate them, simply look for the anvil icon on your map. Interact with the blacksmith, and in the window that appears, select the middle tab at the top.
Repairing Options: Simple and Efficient
Once you’ve accessed the repair interface, you’ll be presented with three options:
- To repair individual items directly in your inventory, click on the hammer icon and then select the gear you want to repair.
- Equipped: This option repairs all the gear you currently have equipped. The total cost for the repairs will be displayed.
- All items: Opt for this choice to repair all the gear in both your inventory and equipped slots. Once again, the total cost will be visible.
Now that you are equipped with this knowledge, ensure that your gear is always in peak performance by repairing it regularly. Embark upon the challenges that lie ahead and vanquish the darkness that shrouds Diablo 4’s world!
Unlocking the Secrets of Salvaging Gear in Diablo 4
Got a load of gear cluttering up your inventory in Diablo 4, but not willing to part with it just yet? No worries, because we’ve got the perfect solution for you! Discover how to salvage your gear for valuable resources and unleash the true power of fashion in Hell.
Salvaging: A Treasure Trove of Benefits
If you’re an avid dungeon crawler, you know how quickly your inventory fills up with all the loot you find. Fear not, for salvaging gear is the key to reclaiming that precious bag space and keeping the treasure hunt alive!
Not only does salvaging free up space, but it also grants you valuable crafting materials. So, rest assured, nothing goes to waste. Plus, the cherry on top – you’ll be granted the appearance of certain salvaged weapons or armor to transform your look into Hell’s hottest sensation!
How Salvaging Works in Diablo 4
Managing your inventory in Diablo 4 is crucial. Just like in previous games, you’ll need to keep your bag space in check when you return to town. Sure, you can sell your unwanted gear to vendors, but the smarter move is to salvage it, ensuring you have a stockpile of crafting materials for later use.
The rewards you get from salvaging depend on the quality of the item being processed. You’ll typically receive rawhide and leather, with higher quality items yielding better rewards. Once the game’s fully unleashed, max-level gear could even grant materials for crafting legendary items! Now, who wouldn’t want that?
The Blacksmith’s Role in Salvaging
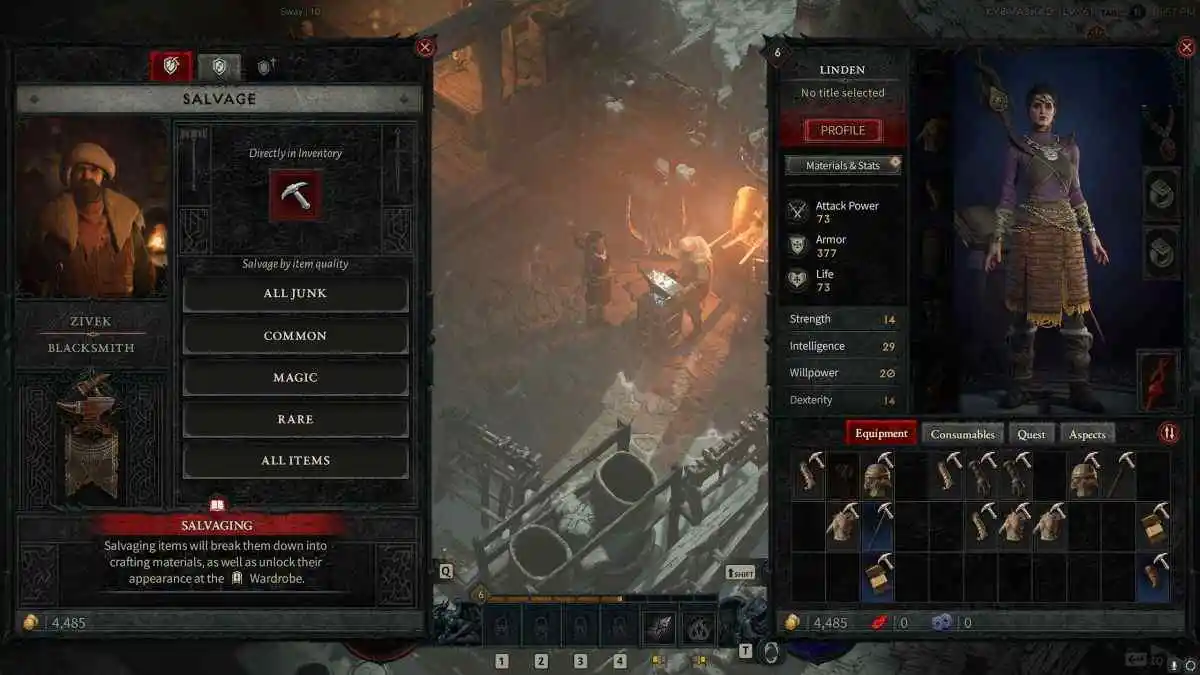
To begin your salvage spree, find a blacksmith in town. They’re usually easy to spot with an anvil icon on your map. Once you locate the helpful NPC, engage with them, click the top tab, and voila – the Salvage window appears, offering you several choices:
- Salvage all junk: Bid farewell to manually marked junk items in your inventory.
- Common: Salvage all common (white) quality items.
- Magic: Salvage all magic (blue) quality items.
- Rare: Salvage all rare (yellow) quality items.
- All items: Ready to go all-in? This option salvages everything except legendary quality items.
To Salvage or Not to Salvage Legendaries? That Is the Question
Legendary gear, oh the allure! But hey, unless you plan to put them on immediately, consider either selling or salvaging all but the cream of the crop legendaries. Want to improve your favorite legendary gear? You’ll need crafting materials from salvaging the legendaries you don’t intend to keep.
We get it – parting ways with high-quality items can be tough. But remember, a new wardrobe awaits, and it’s definitely worth it! Also, enable the tooltip to help you decide whether to extract an aspect from a legendary item instead of simply salvaging it for materials.
The Wise Choice: Salvage for Crafting Materials
In a nutshell, salvage those legendaries with aspects you don’t need, and watch those crafting materials pile up. If you stumble upon a legendary with an aspect that captivates your soul, and it’s a perfect roll of that aspect, extract it at the occultist. Then, let the legendary crafting journey begin!
Therefore, I urge you to embrace the art of salvaging and unleash the power of your fashion-forward self in Diablo 4. Let your gear and style shine like never before, my fellow adventurers! Salvage away!