Embark on an epic journey through the dark world of Diablo 4. Discover the secrets of Murmuring Obols, Altars of Lilith, Whispering Keys, Faded Plaques, Glyphs, and more. Unleash legendary powers, uncover hidden treasures, and optimize your character for ultimate success. Your adventure awaits!

Murmuring Obols
Embark on a quest to wield legendary power with the enigmatic Diablo 4 Murmuring Obols. These mysterious blue coins hold the key to acquiring legendary gear and unlocking Silent Chests scattered across the realm of Sanctuary. Discover how to obtain and spend this valuable currency to enhance your journey.
Gathering Murmuring Obols: A Path to Legendary Treasures
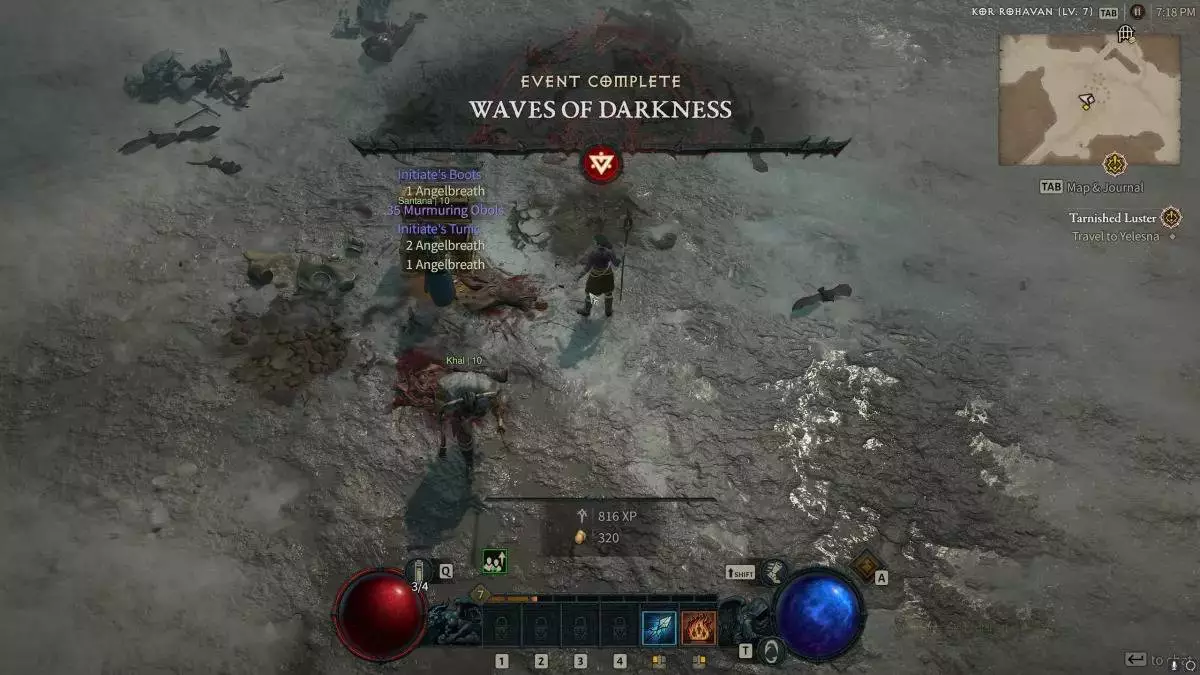
In the early stages of your adventure, the most reliable method of obtaining Murmuring Obols is by completing random overworld events. These events are scattered throughout the map and can be tackled solo or with a group. You can earn a maximum of 35 Murmuring Obols for each event, with additional rewards for completing optional Mastery requirements. Certain quests will also reward you with Murmuring Caches, consumable items that grant you 50 Murmuring Obols.
Keep in mind that Murmuring Obols do not appear in your inventory. Instead, access your character sheet (press C or I) and click the “Materials and Stats” button to find your currency. There is a cap on the number of Murmuring Obols you can hold, but you can increase this limit by accumulating Renown and discovering Altars of Lilith.
Unlocking Hidden Treasures: What to Do with Murmuring Obols
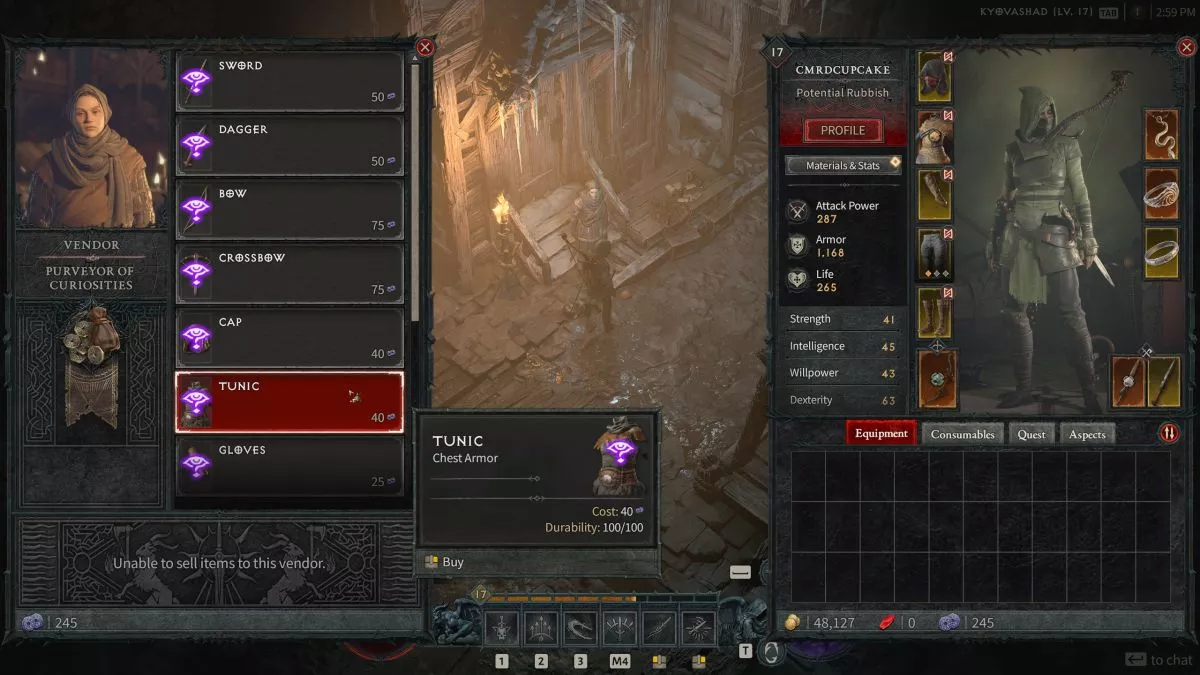
Seek out the elusive Purveyor of Curiosities vendors located in various towns across Sanctuary to make use of your Murmuring Obols. These mysterious vendors offer a selection of gear and a unique item called the Whispering Key. The gear you purchase will be random, with only the equipment slot of your choice in your hands—the rest is left to chance.
RELATED: Diablo 4 – Your Comprehensive Guide to Conquer the Dark World
Similar to Kadala from Diablo 3, there is a 10% chance that the item you buy from the Purveyor of Curiosities will be of Legendary quality. Given the capped currency, taking this risk is worthwhile, as you can always salvage any gear you acquire for crafting resources.
Upon reaching the Nightmare and Torment world tiers, you also have the opportunity to obtain Sacred items through the Purveyor. Look for a glowing section above the question mark item icon to identify the categories with a chance of rewarding you with these rare and powerful items.
Altar of Lilith Statues
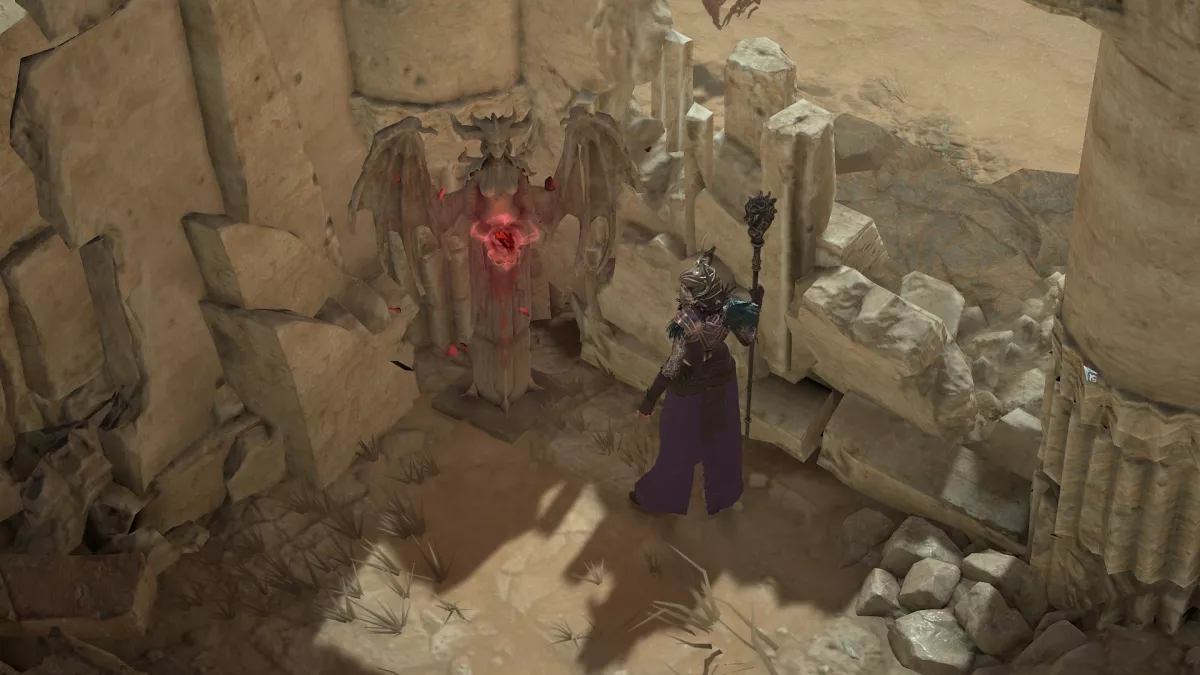
As an avid collector, discovering the Diablo 4 Altar of Lilith statues is a task worth pursuing. Each statue not only rewards you with Diablo 4 renown but also unlocks valuable stat bonuses for all your future characters in the same realm. Prepare to embark on an exploration of Sanctuary to locate these hidden treasures.
Understanding Altars of Lilith: An Eternal Legacy
Altars of Lilith bestow everlasting stat enhancements upon all your forthcoming characters within the Eternal realm, distinct from those in the seasonal category. These precious altars can be acquired singularly. Each Altar of Lilith bestows 10 units of area renown and conventional experience to your character, along with one among the subsequent stat augmentations:
- +2 Strength
- +2 Dexterity
- +2 Intelligence
- +2 Willpower
- +5 Murmuring Obols capacity
- +1 Paragon Point
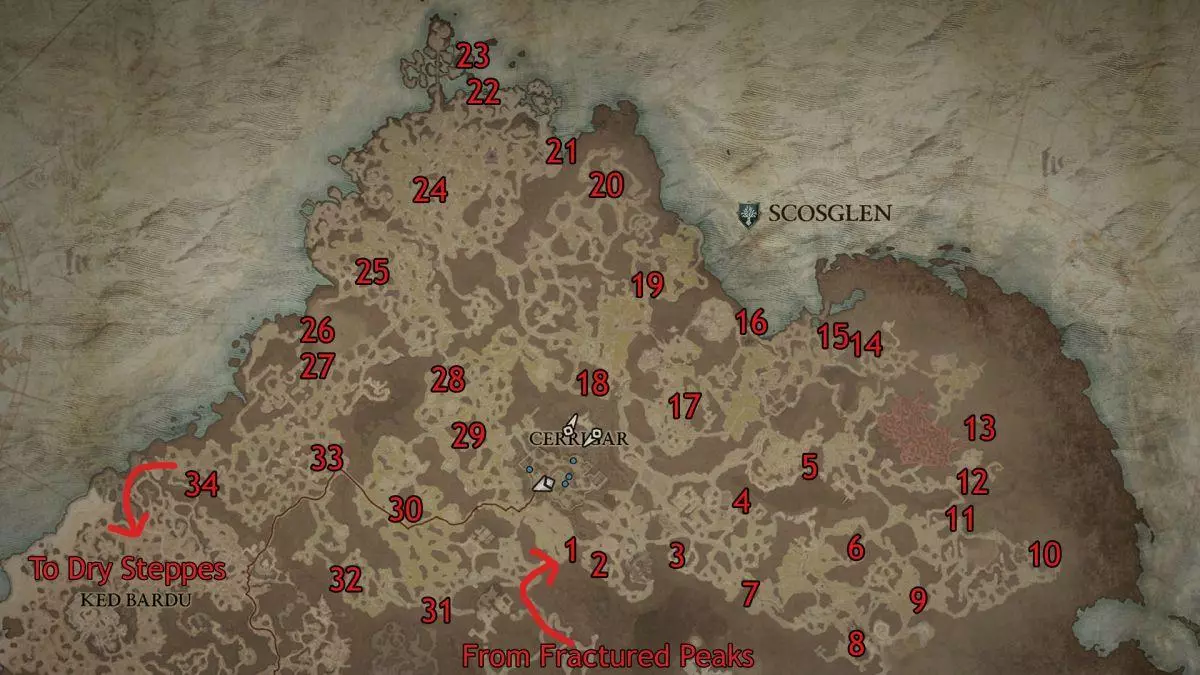
Fractured Peaks Altar of Lilith Locations
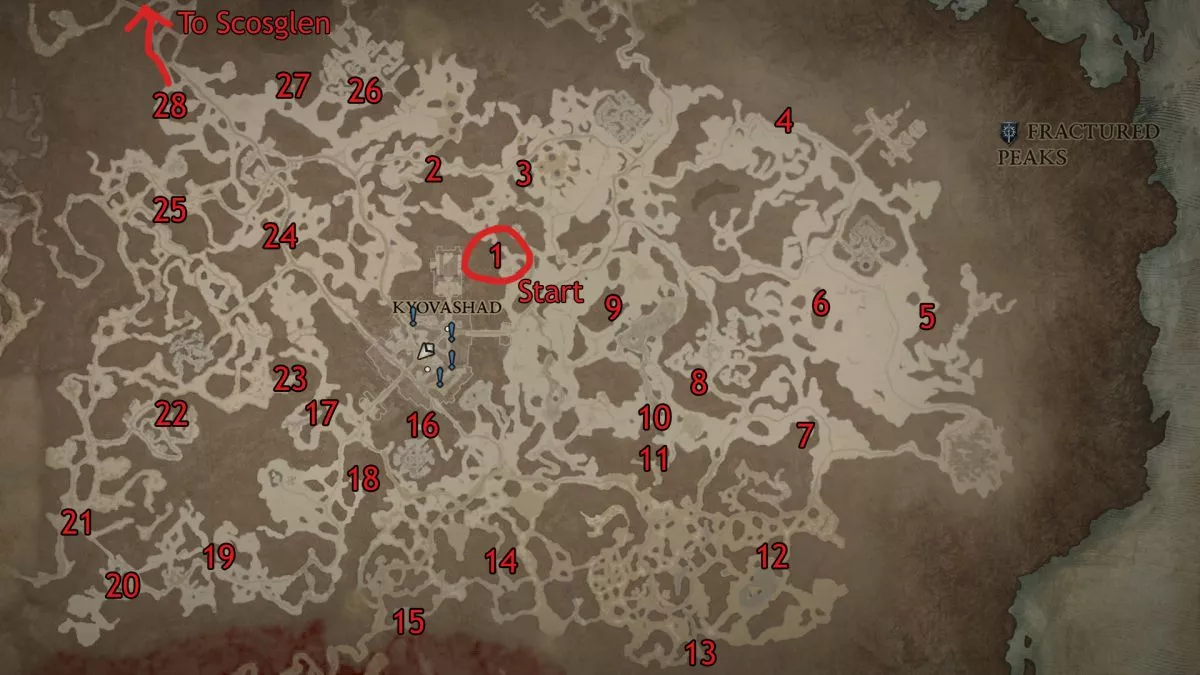
Fractured Peaks houses a total of 28 Altars of Lilith. While some are easily spotted along the paths, others may be tucked away or locked behind strongholds. Here are some hints for finding the trickier ones:
- Crags of Ill Wind (2):Located at the base of a minor ridge.
- The Deep White (3): Similarly nestled along the foot of a ridge.
- Fields of Judgment (6): Contained within a stony crater oriented away from the main route.
- Malnok (8): Inside a house blocked by ice (requires stronghold clearance).
- Nostrava (22): Through a broken wall at the back of a house (requires stronghold clearance).
- Melnik’s Hill (25): Inside a house.
- Kor Dragan (26): On the south ramparts accessed by a ladder (requires stronghold clearance).
Scosglen Altar of Lilith Locations
Scosglen boasts 34 Altars of Lilith. Some are obscured or hidden in strongholds, making them more challenging to find:
- The Daudur Peats (5): Almost completely obscured by a wall to the east of Tirmair.
- Moordaine Lodge (14): Under a log northwest of the entrance (stronghold).
- Stormbreak Cove (21): Along the southeastern shoreline of Hope’s Light, positioned with its rear facing the camera.
- Hope’s Light (23): To the east of the stronghold (requires stronghold clearance).
- Tur Dulra (26): To the east of the stronghold, requires revealing a jump by breaking a log.
Dry Steppes Altar of Lilith Locations
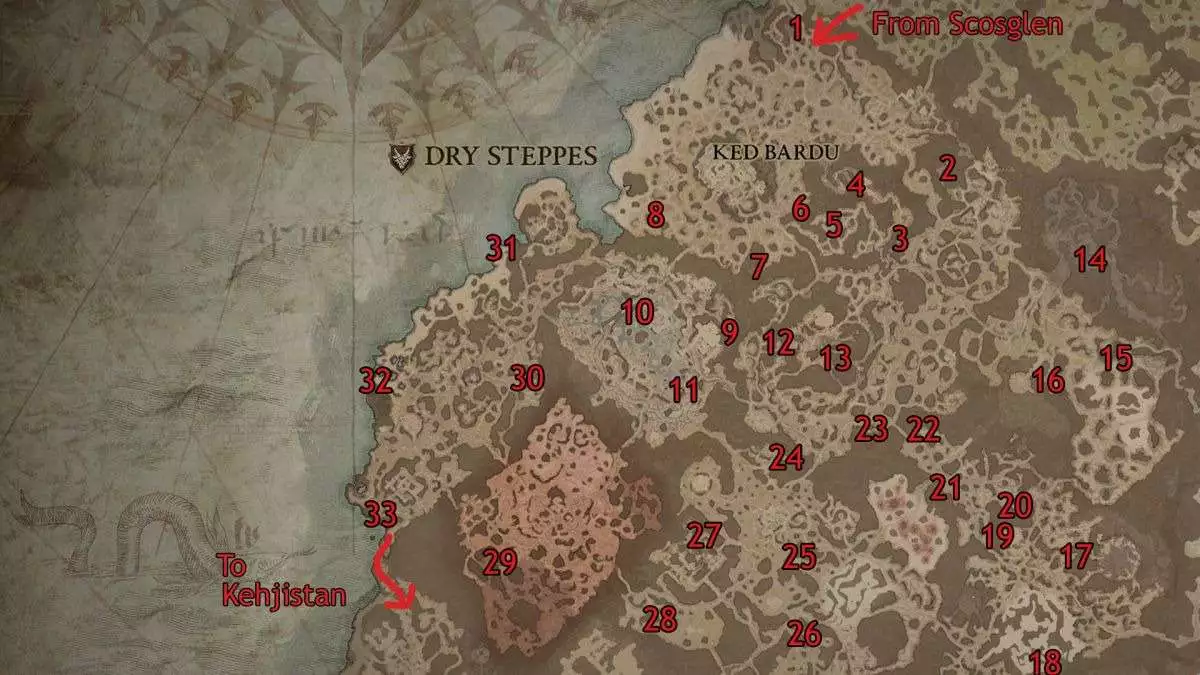
Dry Steppes hosts 33 Altars of Lilith. Some may be challenging to find due to hidden locations:
- Wayward Plains, north (1): Partially hidden in a cave wall.
- The Onyx Watchtower (13): Hidden in a cave on the southeast corner of the stronghold.
- Path of Stray Souls (16): South of Fate’s Retreat, hidden behind rocks.
- Qara Yisu (18): To the east of the stronghold, partially hidden by wooden scaffolding.
- Temple of Rot (27): Inside the stronghold.
Kehjistan Altar of Lilith Locations
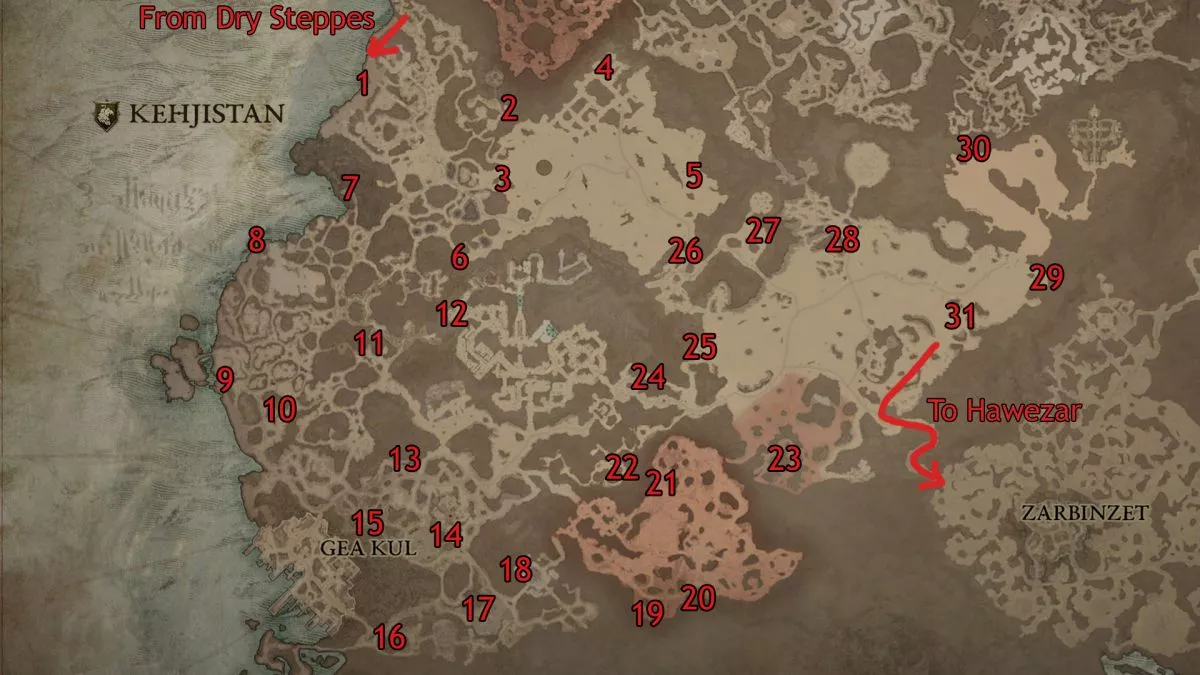
Kehjistan features 31 Altars of Lilith. Some are well-hidden by trees or structures:
- Altar of Ruin (1): Partially obscured by trees.
- Central Plateau (13): Hidden by trees with its back to the camera.
- Omath’s Redoubt (18): Inside the stronghold, accessible after unlocking it.
- Fields of Hatred, northwest (21): Hidden behind trees.
- Alcarnus (27): Inside the stronghold.
Hawezar Altar of Lilith Locations
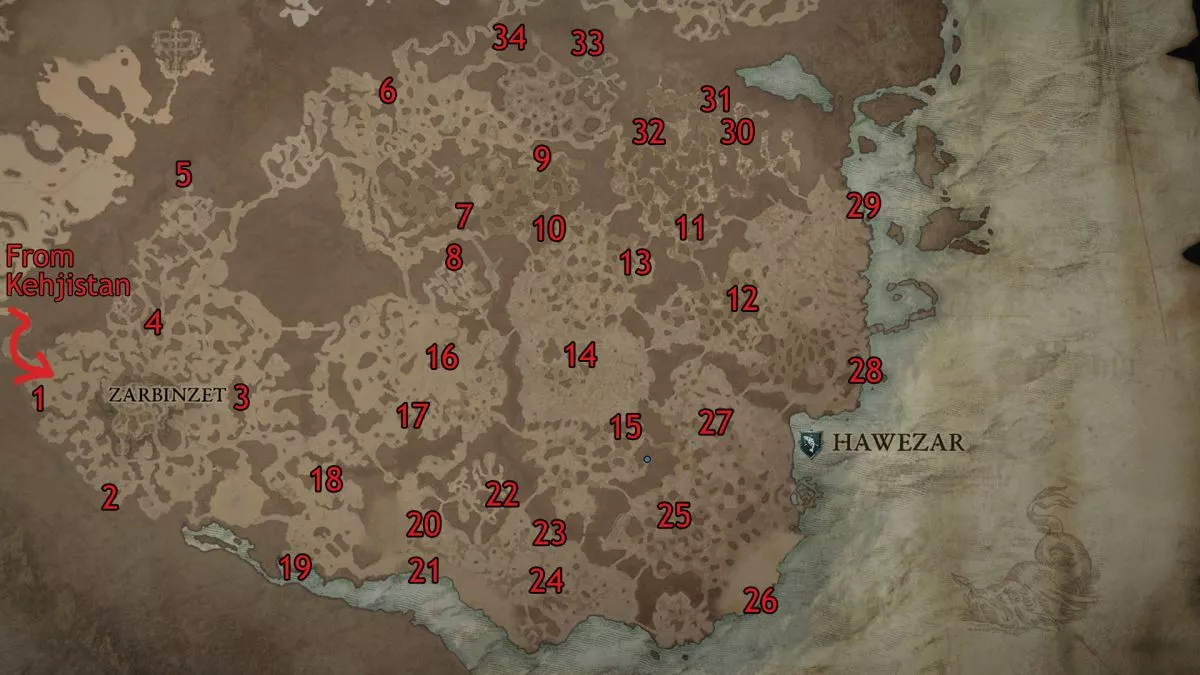
Hawezar holds 34 Altars of Lilith. Some are accessible without unlocking strongholds:
- Crusader’s Monument (5): Partially hidden by a tree on the left of the platform.
- Ruins of Rakhat Keep (8): Northmost area of the keep, accessible after jumping across.
- Blightmarsh, northwest (10): Tucked away in a narrow alcove.
- Vyeresz (22): Inside a stronghold, can be accessed quickly before an elite spawns.
- Eriman’s Pyre (33): Next to the Oblivion dungeon entrance, inside the stronghold.
Accomplishing the assembly of every Altar of Lilith sculpture within a specific area bestows upon you the coveted titles of Seeker and Wily Player. For those intrepid enough to unearth all statues scattered across Sanctuary, the grand accomplishment of the Collector challenge awaits, accompanied by the prestigious titles of Hoarder and Treasure-bearer. Embrace the thrill of the journey and seize these concealed riches to solidify your status as a bona fide legend within the realm of Sanctuary!
Unlocking Silent Chests with Diablo 4 Whispering Keys
In the vast world of Sanctuary, you may stumble upon Silent Chests that hold high-tier gear, but to access their treasures, you’ll need Diablo 4 Whispering Keys. Here’s how to get and use these keys to unlock the mysterious Silent Chests:
Acquiring Diablo 4 Whispering Keys
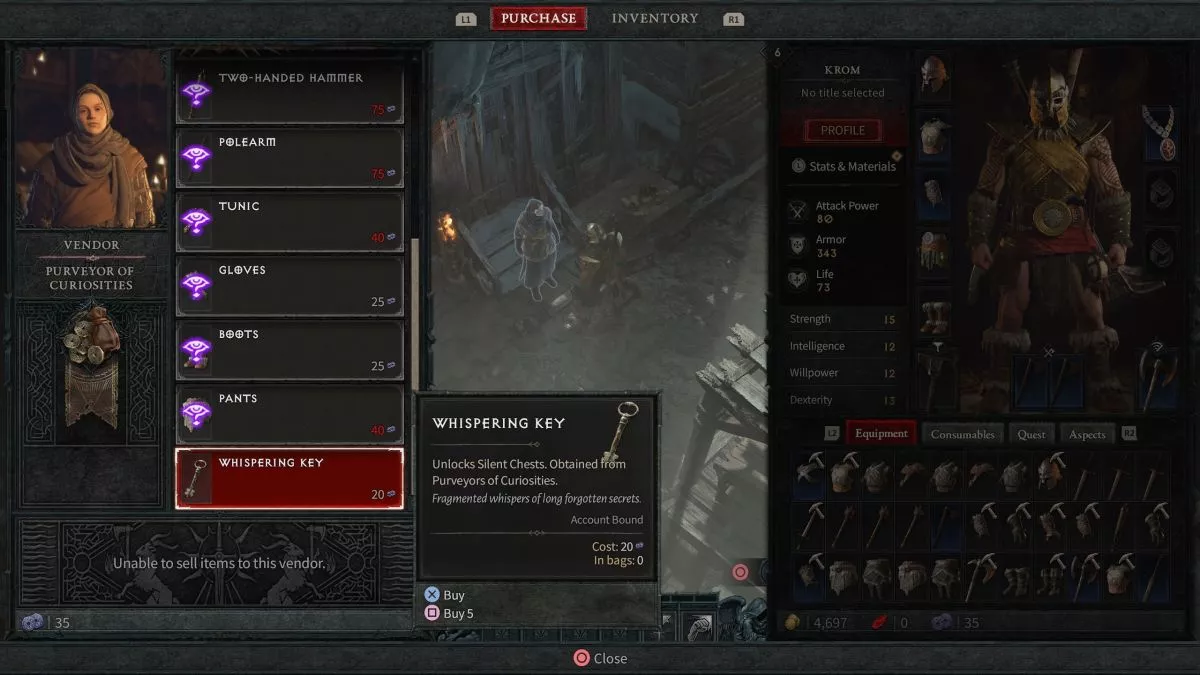
Whispering Keys can be obtained from the Purveyor of Curiosities vendor, found in various towns across the Fractured Peaks. However, this vendor doesn’t accept gold as payment; instead, you’ll need to use Murmuring Obols. These Obols are mainly rewarded for completing events scattered throughout Sanctuary.
Each Whispering Key costs 20 Murmuring Obols. Given that a successful event can award up to 35 Obols, including the Mastery challenge rewards, you should have no trouble collecting the required currency.
Understanding Diablo 4 Silent Chests
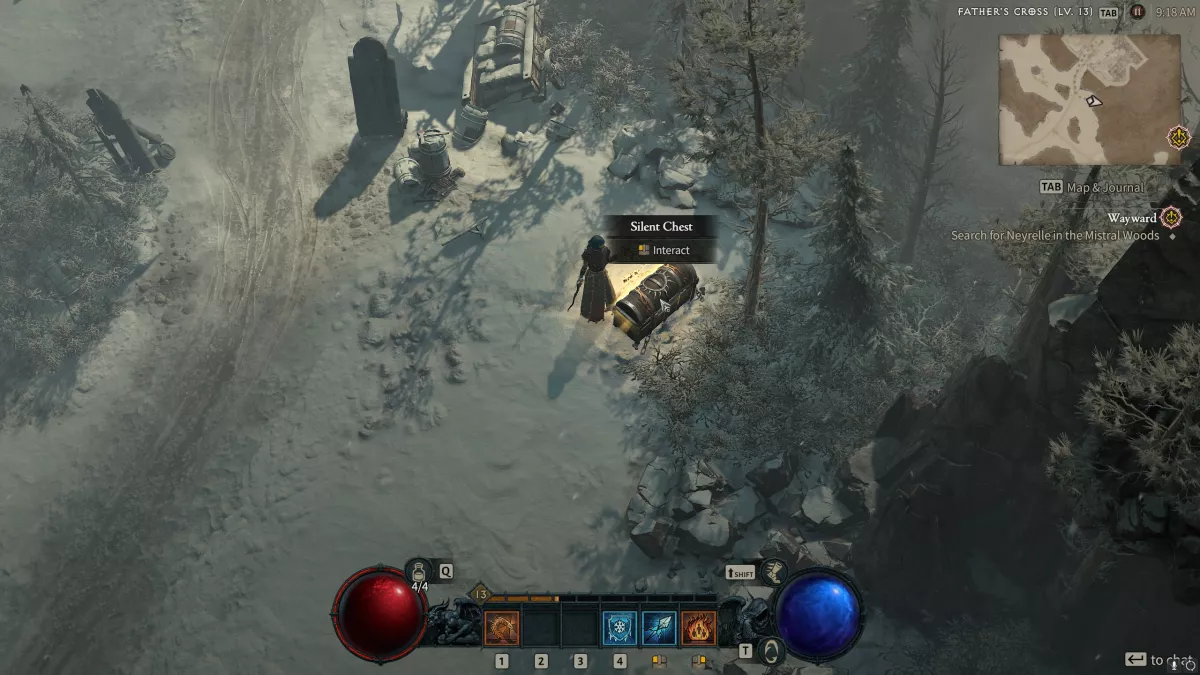
Silent Chests are special chests that randomly spawn in various locations around Sanctuary. They often replace regular chests, making them more challenging to find. As these chests are locked, you won’t be able to open them without a Whispering Key. It’s essential to have a key ready when you encounter a Silent Chest, as they may not remain available indefinitely.
To avoid the disappointment of a disappearing Silent Chest, consider carrying a Whispering Key in your inventory. This way, you can promptly unlock the chest’s contents without the risk of losing its valuable loot.
If you’re keen on exploring all possible chest spawn locations in Fractured Peaks, you can use an interactive map to filter and reveal potential chest locations. This will help you keep an eye out for Silent Chests and ensure you don’t miss out on the chance to unlock their hidden treasures.
Now equipped with Diablo 4 Whispering Keys and a keen eye for Silent Chests, you’re well-prepared to delve into the depths of Sanctuary and discover the legendary gear that awaits you. May your adventures be fruitful, and your loot plentiful!
Solving Faded Plaque Puzzles in Diablo 4
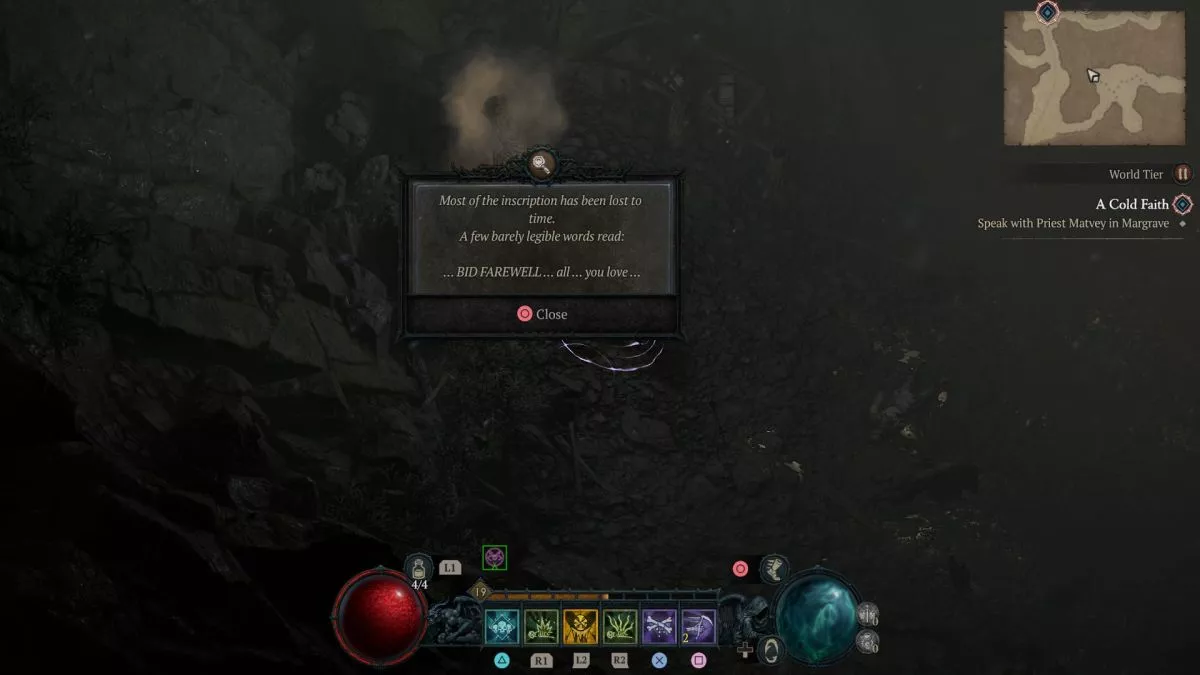
In Diablo 4, you’ll come across statues with Faded Plaques attached to them. These plaques contain cryptic messages that hint at the specific emote you need to use to activate them. Successfully activating a Faded Plaque rewards you with temporary boons or bonuses similar to the blessings you receive from shrines. Here’s how to solve these little puzzles and the rewards you can expect:
1. Bid Farewell
- Text: “…BID FAREWELL…all…you love…”
- Emote: Bye
- Reward: Speed increase
2. Provoke
- Text: “…dare…PROVOKE…ire…fate…”
- Emote: Taunt
- Reward: Lots of health potions
3. Atone
- Text: “…ATONE…thy darkest…sins…”
- Emote: Sorry
- Reward: Become unstoppable
4. Give Aid
- Text: “…GIVE AID…meek…powerless…”
- Emote: Help
- Reward: Grants a barrier
5. Greet
- Text: “…GREET…death…open arms…”
- Emote: Hello
- Reward: Makes you invisible
6. Embolden
- Text: “EMBOLDEN…soul…unrelenting evil…”
- Emote: Cheer
- Reward: Bonus gold drop
7. Gratitude
- Text: “GRATITUDE…reward…virtuous…”
- Emote: Thanks
- Reward: Emboldened Spirit buff
Make sure you have all these emotes available in your emote menu. To access them, you may need to cycle to the second wheel by pressing the corresponding key (e.g., E) and using the mouse wheel. Once you’ve selected the correct emote, stand in the circle just in front of the Faded Plaque statue and activate the emote to trigger the puzzle and receive your reward.
Diablo 4 Whispers of the Dead
In Diablo 4, Whispers of the Dead is an activity that becomes available once you’ve completed the final act of the campaign. To unlock it, finish the campaign until you reach around level 45. Once unlocked, you can participate in Whispers of the Dead to earn Grim Favors by completing specific activities or “whispers” scattered across the map. These activities may include cellars, dungeons, or quest-like objectives with time limits.
Here’s a step-by-step guide on how to participate in Whispers of the Dead:
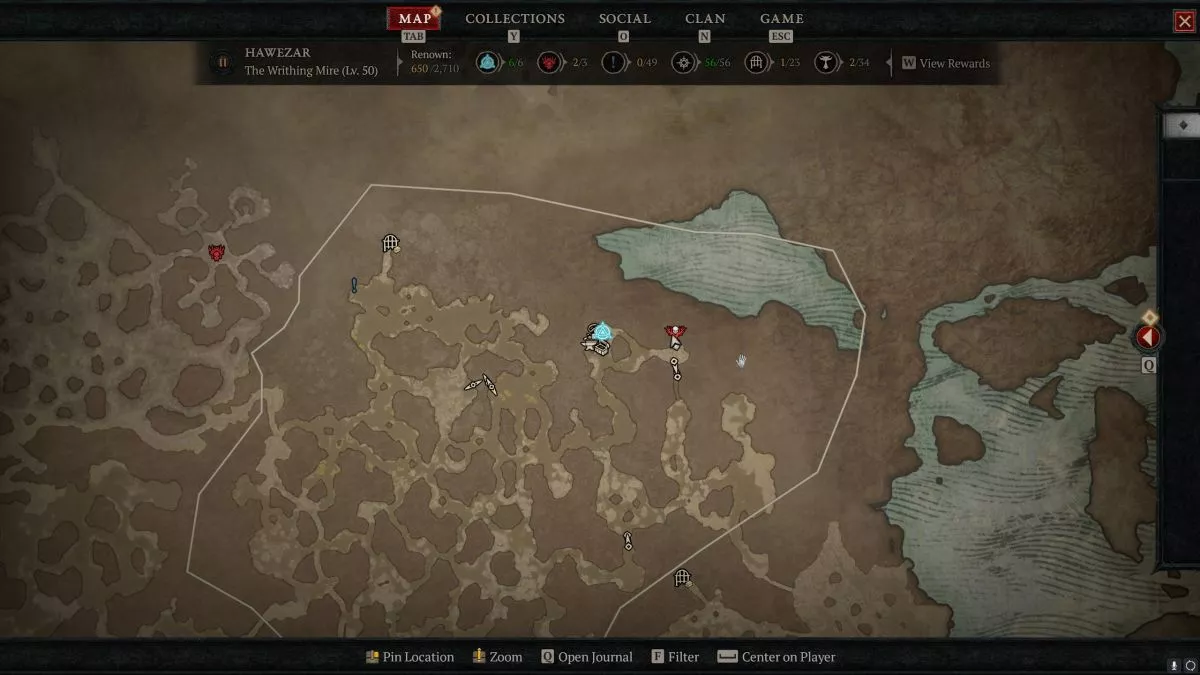
1. Unlock Whispers of the Dead: Complete the final act of the campaign, and you’ll receive a priority quest that sends you to the Tree of Whispers, located in the northeast corner of Hawezar. You can find the exact location marked on the map, and a nearby waypoint makes it easily accessible.
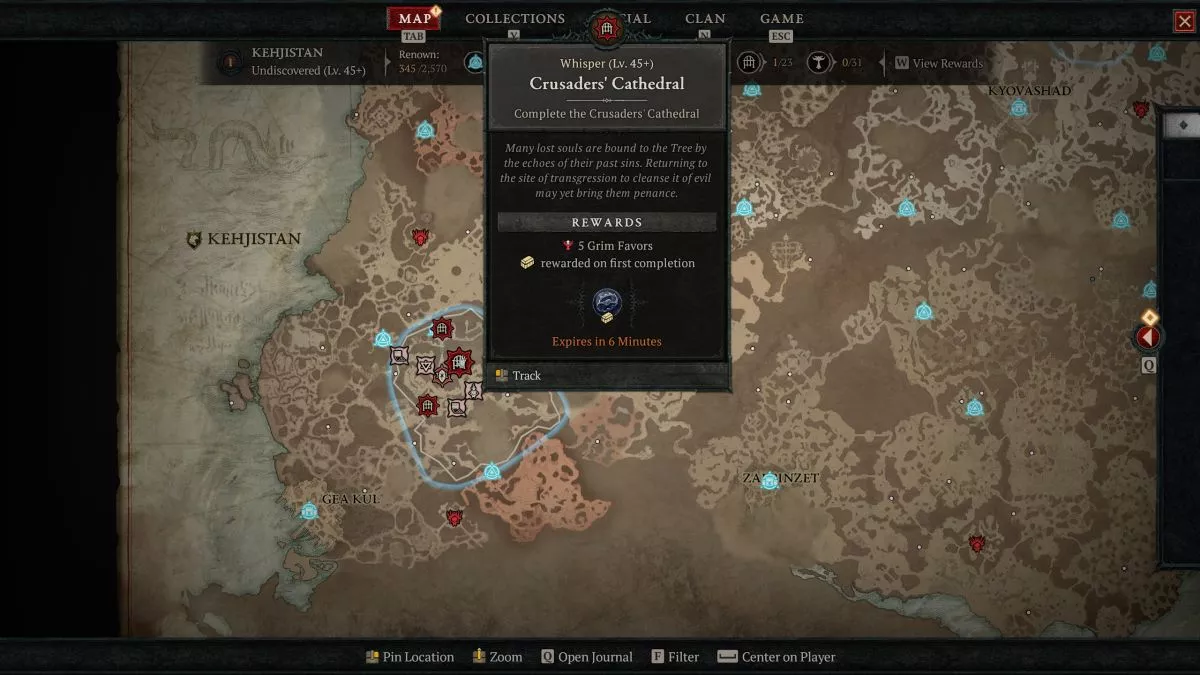
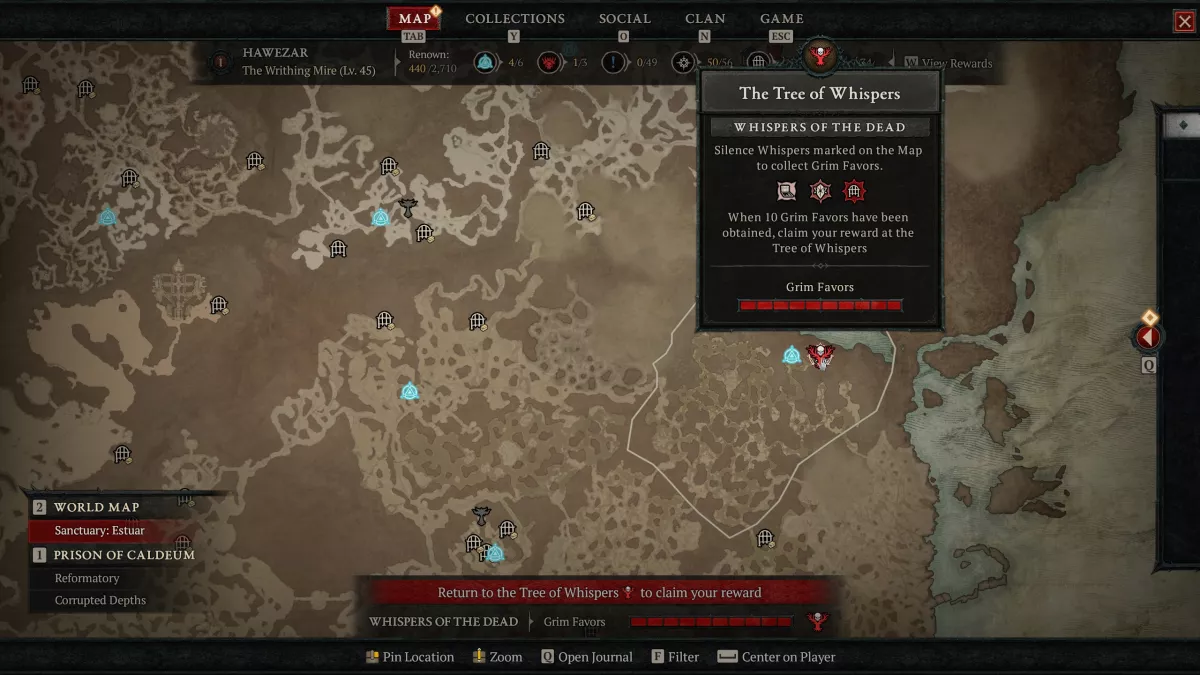
2. Collect Grim Favors: Speak to the Tree of Whispers, and it will explain how the activity works. You need to complete various “whispers” or activities with time limits to earn Grim Favors. These activities can be cellars, dungeons, or other objectives marked on the map. Completing an entire dungeon yields five Grim Favors, while simpler kill quests grant one Grim Favor.
3. Time Limit: Be aware that the objectives have time limits, and once the time runs out, the whispers will move to new locations.
4. Return to the Tree of Whispers: After accumulating ten Grim Favors, return to the Tree of Whispers to claim your rewards
5. Choose Your Rewards: There are three reward caches to choose from, and you’ll receive a substantial amount of XP as well. The available caches include:
- Vast Array of Single-handed Weapons: of Legendary Caliber
- Collection of Amulets: Common quality
- Collection of Gauntlets: Common quality
6. Rewards Contents: Each cache contains various items such as herbs, gold, gems, and rare items. If you choose the legendary cache, you’ll receive a legendary off-hand item, but keep in mind that legendary gear can also drop from common quality caches.
7. Regular Hand-ins: After the initial quest hand-in that grants a legendary option, subsequent hand-ins usually offer three common quality caches. It’s not clear if you’ll receive a weekly legendary cache or if it’s a one-time reward.
RELATED: Diablo 4 Review – Forging Your Legend
Participating in Whispers of the Dead and collecting Grim Favors can significantly boost your XP, making it an excellent activity for leveling up your character and acquiring valuable rewards in Diablo 4.
Diablo 4 Fiend Roses: Where to Find and How to Get Them
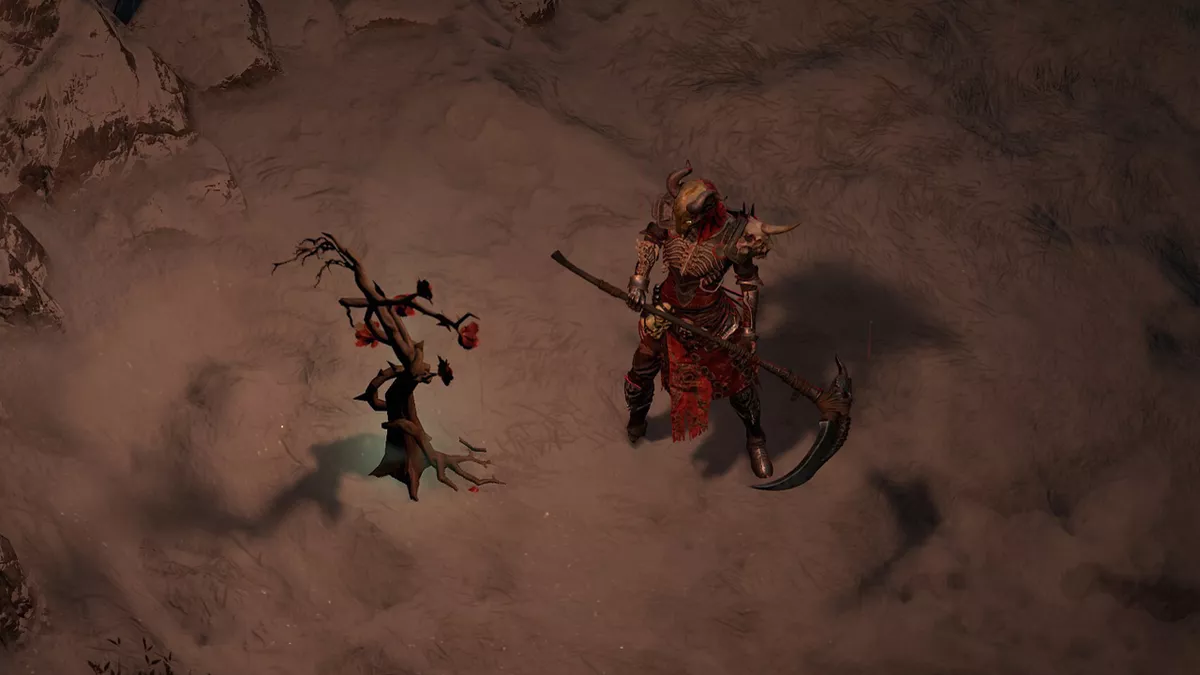
In Diablo 4, Fiend Roses are valuable endgame crafting materials used to upgrade gear and re-roll its stats. They can be quite rare, but you can find them growing around areas affected by Helltides. However, they only become available once you reach level 50 and unlock the Nightmare World Tier. Although it’s technically possible to obtain them before reaching level 50 by opening Silent Chests using Whispering Keys, it’s better to wait until you’re at the endgame to focus on finding Fiend Roses, as gear will be frequently replaced while leveling.
Here’s where you can find Fiend Roses in Diablo 4:
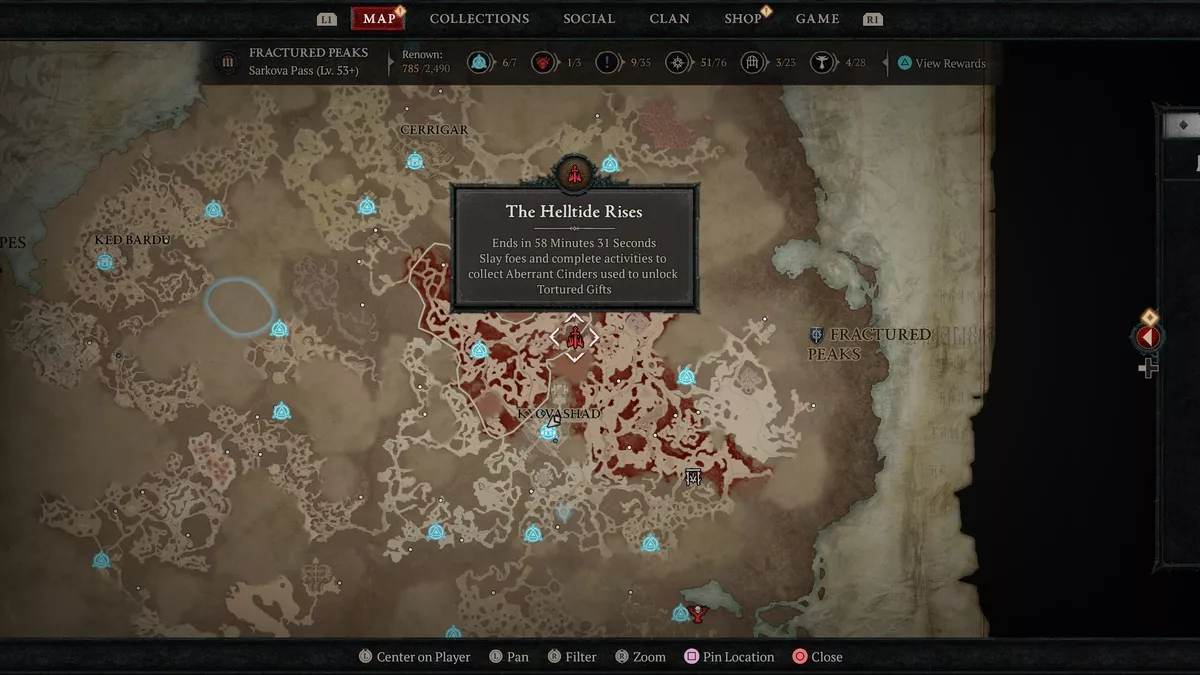
1. Rare Plants in Helltide Locations: Fiend Roses are primarily found growing around areas affected by Helltides. Helltides are events that occur in certain areas of Sanctuary, bringing a darker atmosphere and tougher enemies. The rare plants can be spotted and collected in these Helltide locations, but they are a rare spawn, so be prepared to explore the entire area to find one.
2. Inside Tortured Chests in Helltides: You can also find Fiend Roses inside Tortured Chests that spawn during Helltide events. To open these chests, you’ll need Aberrant Cinders, which you can obtain by defeating enemies in Helltides. Not only do the chests have a chance of containing Fiend Roses, but Aberrant Cinders themselves can drop this valuable resource.
3. Drops from Enemies in Helltides: Occasionally, Fiend Roses can drop as loot from enemies encountered during Helltide events. While the drop rate may not be very high, defeating enemies in Helltides might yield some Fiend Roses as a reward.
4. Silent Chests: Silent Chests are found scattered throughout Sanctuary from level 5 onwards. To open a Silent Chest, you’ll need a Whispering Key, which can be purchased from the Purveyor of Curiosities using Murmuring Obols. Silent Chests are very rare, and obtaining Fiend Roses from them is also a rare occurrence.
As a general tip, it’s best to focus on finding Fiend Roses and utilizing them to upgrade your gear once you reach level 50 and unlock the Nightmare World Tier. They become more common in Helltide locations at this stage, and you can maximize their use to enhance your gear for endgame challenges in Diablo 4.
Diablo 4 Glyphs: How to Obtain, Use, and Upgrade Them
In Diablo 4, Glyphs are powerful bonuses that can be placed on your Paragon board to strengthen your character in the Nightmare or Torment world tier, as well as optimize your Paragon points for more effectiveness. Understanding how to obtain, use, and upgrade Glyphs is essential for maximizing your character’s potential in the endgame. Here’s a guide on how to do just that:
How to Get Glyphs:
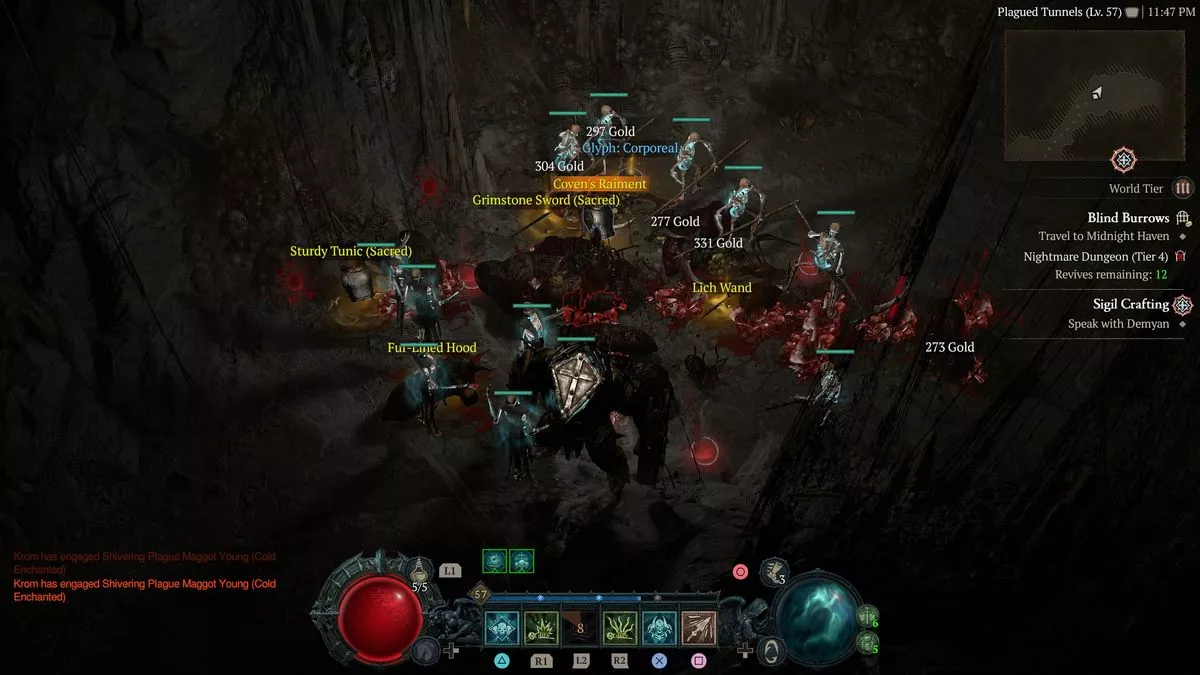
The best way to obtain Glyphs is by doing Nightmare Dungeons. These Glyphs often drop from elite enemies, chests, and the final boss of the dungeon. To access Nightmare Dungeons, you need to be at world tier three, which means completing the campaign and beating the capstone dungeon in Kyovashad. Once you’ve achieved this, you can change your world tier at the statue in Kyovashad’s main square.
To enter a Nightmare Dungeon, you need a Nightmare Sigil. The best chance to get one is by completing Whispers of the Dead for the Tree of Whispers, which rewards you with a loot cache that has a chance of containing a Nightmare Sigil. Once you have a Nightmare Sigil, use it from your consumables to activate the dungeon.
Once you have a Glyph, you can also unlock sigil crafting in Kyovashad, and Nightmare Dungeons will drop more Nightmare Sigils, so you won’t have to worry about obtaining them once you get started.
How to Use Glyphs:
To use a Glyph, you need to slot it into your Paragon board. To access the Paragon board, you’ll need to level up and earn Paragon points. As you gain Paragon points, you can unlock nodes on the board, leading to Glyph sockets. Eventually, you’ll unlock a socket where you can place your Glyph.
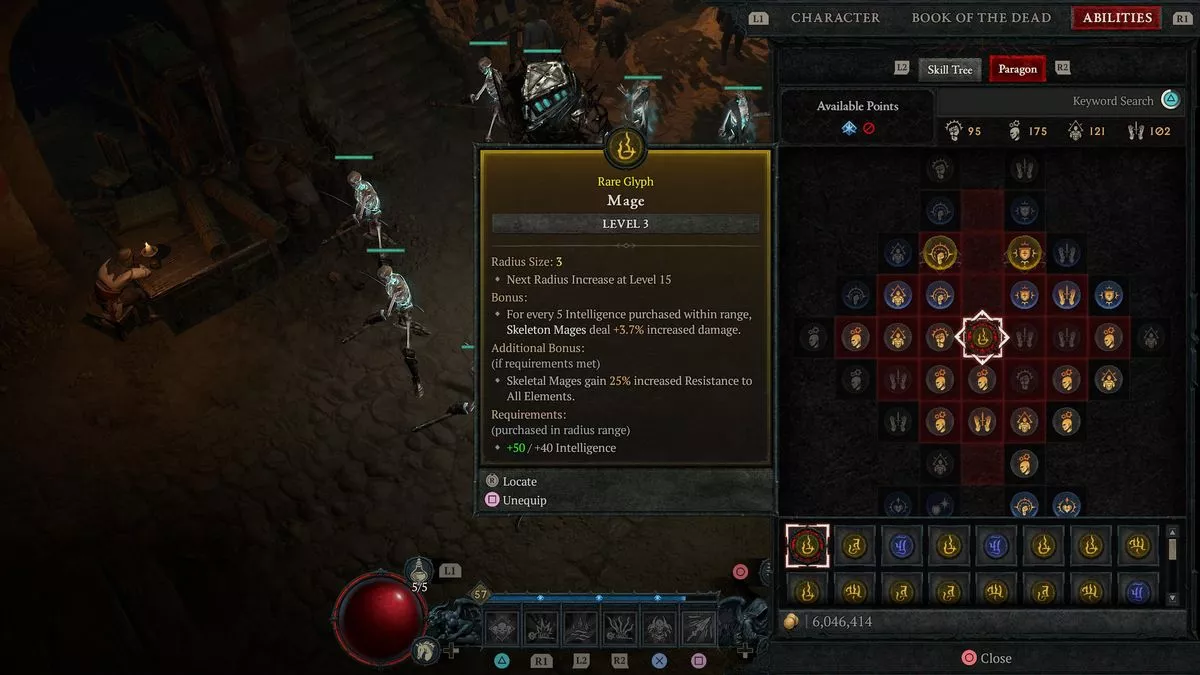
Each Glyph has a Radius and provides a Bonus or set of bonuses based on its rarity. For example, a rare Necromancer “Mage” Glyph might have a radius of three nodes on either side. For every +5 intelligence node you unlock within that radius, your skeletal mages get a +3.7% damage bonus. Additionally, rare Glyphs have an additional fixed bonus when a certain number of specific nodes are unlocked in the radius.
The key to using Glyphs effectively is placing them in sockets where their bonuses can stack optimally based on the nodes available in their radius. For instance, if you have more intelligence nodes available in the Glyph socket’s radius than other attributes, it makes sense to use a Glyph that grants an intelligence-based bonus.
How to Upgrade Glyphs:
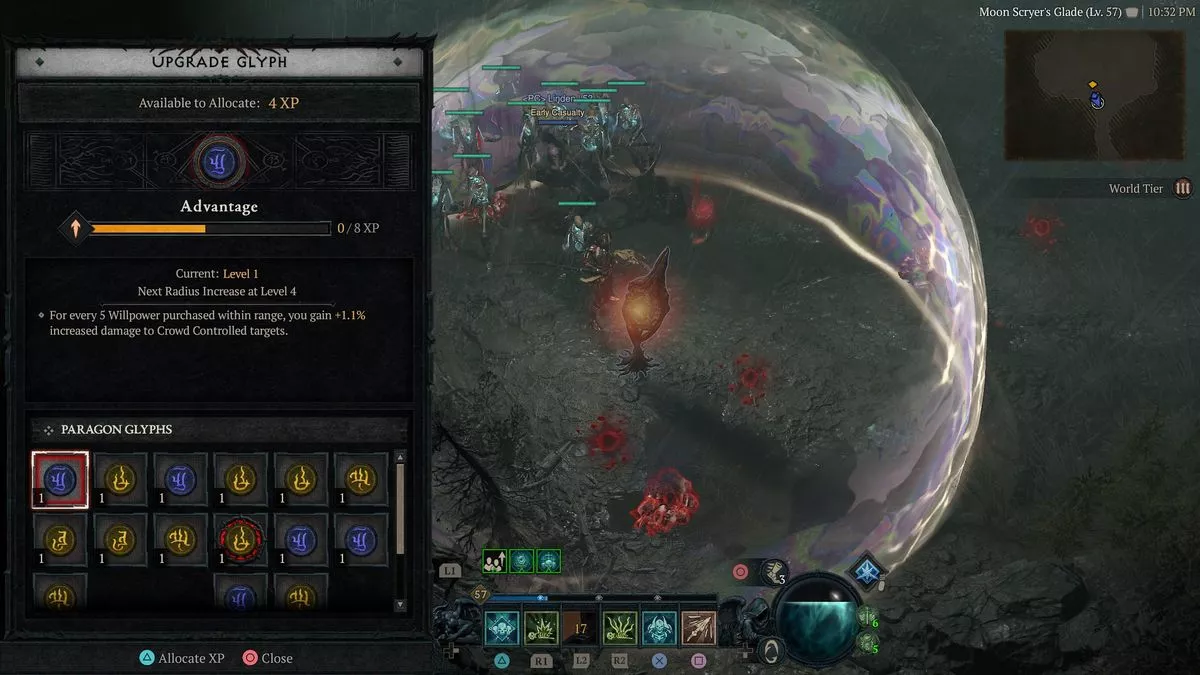
If you want to make a Glyph stronger, you can upgrade it by completing Nightmare Dungeons. After defeating the final boss or objective in the dungeon, an Awakened Glyphstone will appear. You can then invest the XP you’ve earned into the Glyph of your choice to level it up. As you level up a Glyph, its bonuses become more potent, providing greater benefits for each relevant node you unlock in the radius.
It’s important to note that once you allocate XP to a Glyph, it cannot be undone, so choose carefully and invest in Glyphs that complement your character build and play style.